
Cooking on a ceramic kamado grill is an art form. You invest serious time and money into choosing the best brisket or ribs. Yet, trusting the factory dial on the lid is risky. It can spoil your meal in minutes.
Part 1. The Hidden Flaws in Your Grill's Gauge
Why Your Stock Dome Thermometer is Inaccurate
- Drifting Calibration: A simple bump or years of sitting in the rain can skew readings by 20 to 40 degrees. You might think you are cooking at 250°F, but the grill is actually much hotter or cooler.
- Slow Reaction Time: The needle moves slowly. When you adjust the air vents, the temperature changes inside the grill immediately. However, the gauge lags.
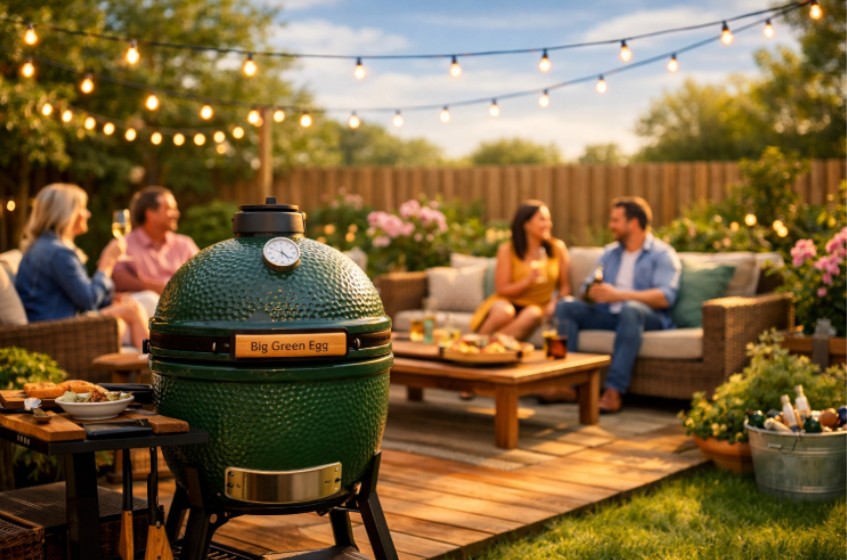
Big Green Egg thermometer replacement for cooking solves the temperature adjustment problem.
Dome vs. Grate Temperature: The 50°F Gap
- Direct Grilling: When steaks are grilling on a Big Green Egg, the grate gets hotter than the thermometer shows. So, despite moderate dome readings, the direct fire still creates a beautiful sear.
- Indirect Smoking: When you use a heat deflector, the airflow shifts. Hot air can pool at the top of the dome before leaving the vent. In this case, the dome might read higher than the grate.
Why NTC Sensors Fail in High-Heat Ceramic Grills
Part 2. ProTemp S1 vs. Traditional Gauges: A Technical Breakdown
| Característica | Stock Analog Gauge | ProTemp S1 Digital Replacement |
| Sensor Type | Bi-metal Coil (Mechanical) | High-Precision Digital Sensor |
| Response Time | Slow (Minutes to stabilize) | Instant (Seconds) |
| Readability | Hard to read at angles | Large, Backlit LCD Display |
| Connectivity | None (Must stand by grill) | Bluetooth/Wi-Fi capable |
| Accuracy | +/- 20°F (Drifts often) | +/- 1.8°F (Lab calibrated) |
| Versatility | Dome Temp Only | Dome & Food Temp |
Part 3. How to Master Temperature Control with a Big Green Egg Thermometer Replacement
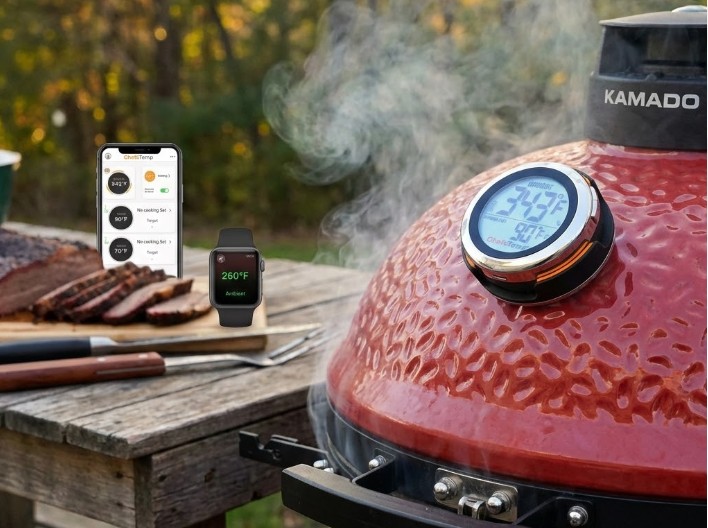
Wired vs Wireless Connectivity
- Safety: You get an instant alert if a grease fire spikes the heat.
- Consistency: You know immediately if the charcoal runs low and the temperature drops.
- Comfort: You can monitor the pit while watching the game inside.
Temperature Probe Accuracy
- Ambient Probe: Clip this to the stainless steel grate. Keep it at least two inches away from the cold meat. Also, keep it away from direct flames.
- Meat Probe: Slide this into the deepest, thickest part of the cut. Stay away from heavy bones or fat pockets. These spots conduct heat differently, giving incorrect numbers.
Professional-Grade Durability
How to master temperature control on a Big Green Egg thermometer replacement.
Part 4. Step-by-Step: Installing the ProTemp S1 Digital Thermometer Replacement
Step 1: Unboxing
Step 2: Set Up the Unit
- Battery Life: The battery lasts 20 hours on Wi-Fi. It lasts up to 300 hours on Bluetooth.
- App Connection: Download the software now. Pair the big green wireless thermometer with your phone.
- Settings: Choose your temperature units (°F or °C).
Step 3: Install the ProTemp S1 on the Grill
- Remove the Old Gauge: Look inside the dome. Find the clip holding the old thermometer. Squeeze it and slide the gauge out from the front.
- Clean the Hole: Soot and grease build up over time. Wipe the area around the hole clean.
- Insert the New Unit: Slide the ProTemp S1 stem through the hole from the outside.
- Secure It: From the inside, slide the clip or silicone washer onto the stem. Push it tight against the wall. This creates a seal. It keeps the smoke inside where it belongs.
- Align the Display: Rotate the screen until it is precisely level.
Step 4: Start the Cooking Process
- Monitor the Heat: Watch the digital readout. It responds far more quickly than the old needle gauge.
- Adjust Vents: To precisely adjust your bottom vent, use this quick data.
- Add Probes: If you want to check food temps, charge the additional probes. Pair them in the app under "Add Probes."
- Heat Limits: Probes can handle up to 212°F internally. The ambient limit is 662°F.
- Safety: Always wear gloves. The sensors get hot. Clean them gently after use.
Part 5. Essential Kamado Accessories for 12-Hour Low and Slow Smokes
1. Heat Deflectors
- Why you need it: It is necessary for indirect cooking. You can use it to bake bread or smoke ribs.
- The risk: Without it, radiant heat hits the meat directly. The bottom burns before the inside cooks.
2. Charcoal Baskets
- Better Air: It prevents ash from clogging the air intake holes.
- Faster Cleaning: You can lift the basket out. Shake out the cold ash. Then, add fresh coal in seconds.
3. Airflow Tools
4. Wireless Meat Thermometer Probes
Big Green Egg Dome Thermometer Replacement and other accessories for busy cooking.
Part 6. Conclusion
Part 7. FAQs about Big Green Egg Thermometer Replacement
Q1: Is the ProTemp S1 waterproof enough for year-round outdoor storage?
Q2: How often do I need to calibrate the ProTemp S1?
Q3: What is the maximum temperature the ProTemp S1 probe can handle?
Q4: Can I monitor multiple pieces of meat with the ProTemp S1?
Q5: Does the ProTemp S1 fit other kamado grills besides the Big Green Egg?
Q6: How far is the Bluetooth range for the wireless connection?
Q7: Why is my digital dome reading different from my grate probe?
How to Cook Grilled Pork Chops Perfectly Every Single Time
When it’s time for seasonal grilling, pork chops are an underappreciated, highly versatile selection. Many people don’t know how juicy, flavorful, and delicious grilled pork chops can be, so you’re sure to delight the guests at your BBQ when you serve them the perfect mouth-watering pork chops straight off the BBQ grill. To learn everything you need to know to start cooking better pork chops today, read on!
Grilling Delicious & Flavorful Pork Chops
When picking meats for your BBQ, it can be easy to overlook pork chops. Many of us have experienced dried out and unappetizing pork chops, so expectations are often not high. However, there’s a lot to love about pork chops when they’re selected, cooked, and served correctly. They’re more versatile than chicken, less expensive than a high-end steak, and relatively quick and easy to prepare if you take the right steps. If you’re an aspiring amateur chef, grilling pork chops is a great way to build your skills. So dig in!
Before you get started, it’s important to recognize the two key factors in excellent grilling: time and temperature. Getting your meat to exactly the right temperature is the best and most important step to take to ensure a safe and delightful grilling experience with an appetizing and delicious end product. Temperature is what makes the real difference between delicious pork chops and those that are subpar. And the easiest way to know the temperature of your pork chops is with a precise and accurate digital thermometer.
Grilling Great Pork Chops: How to Chose the Right Cut
The process of BBQ-ing pork chops begins with selecting the ideal cuts of meat for your needs. This can require more well-informed decision-making upfront.
Compared to steaks or chicken, you have more options when it comes to pork chops, because they can be cut from different areas of the loin. Your options may include:
- Blade end cuts, from the front of the loin near the shoulder, tend to lead to more fatty pork chops than other common options.
- Rib chops, which tend to be leaner, have large and smooth sections of meat.
- Bone-in center cut chops include loin and tenderloin and, like other bone-in meats, may take longer to cook to perfection.
- Sirloin is from the back end and includes more muscles than other selections.
If you’re an amateur chef just starting out, try experimenting first with rib cut chops. That’s because they tend to produce pork chops that are more tender and less chewy than others.
The thickness of your chops will affect how long they cook, as well as the final product. Thicker pork chops tend to cook more quickly than thinner ones so it’s best to start with thicker cuts, usually about one inch in thickness.
How to Brine your Pork Chops
It’s usually a good idea to submerge your pork chops in brine before they get near your BBQ grill. Brining your pork chops accomplishes two useful things. It helps season them evenly, and it brings some extra moisture into the game. This way, even if you cook your pork chops for a bit longer than the ideal length of time, you will run less risk of overcooking them, which is what causes some pork chops to be chewy and unpleasant in taste and texture.
Creating a great brine for your pork chops is an endeavor unto itself, but it doesn’t need to take too much time. To get started, all you need is some salt whisked in cold water. You can add some sugar if you like. With some experience and experimentation, you may find that you prefer your brine to include pepper and other flavorful ingredients to add some surprise and delight to your pork chops. It’s all part of the process.
You should bring your pork chops for 30-120 minutes, which you can do while your grill is heating up to the right temperature for cooking your pork chops.
Season Your Pork Chops: Preparing Your Pork Chops for the Grill
After you’ve finished bringing your chops, dab with a dry paper towel and add your seasoning of choice to both sides. Pepper works well, or you can experiment with other spices. At this step of the process, you shouldn’t need to add any more salt – you took care of that in the brining step of the process, and you’ll want to avoid over-salting.
The Perfect Pork Chop: Time & Temperature
Now! Here’s where things get interesting. To reiterate, the difference between a dried-out and chewy pork chop comes down to time and temperature.
As with steaks, you want to create two “zones” of heat on your grill, high (for searing) and medium (to finish). Searing your pork chops will usually take about three minutes per side, while finishing them up should take four to eight minutes depending on how thick your pork chops are and how well done you want them to be.
Do not judge the doneness of your pork chops by sight! You run the risk of serving undercooked pork chops, which is a health hazard, or serving too-well-done pork chops, a tough and chewy experience no one enjoys.
Using your meat thermometer get your Pork Chops to the ideal temperature to which to cook your pork chops is 145 degrees Fahrenheit. When your pork chops reach 145 degrees Fahrenheit in temperature, you should remove them from the grill and let them “rest” for about five minutes.
Then, add your favorite barbecue sauce – or, if you’re feeling adventurous, try other sweet and tangy sauces on the side – and you’re ready to serve delicious, tender pork chops to your guests
The Perfect Pork Chop Recipe
Ingredients
- 4 pork chop cuts
- 6 cups cold water
- About 1 ¾ ounces of salt
- 1 teaspoon of pepper or other spice
- 3 tablespoons of granulated sugar
- Optional brine flavors of your choice
Cooking Instructions
- Prepare your brine, mixing your water, salt, granulated sugar, and other flavorings in a bowl and whisking until it’s all thoroughly combined and dissolved.
- Brine your pork chops for 30-120 minutes.
- Heat your grill to a temperature of 450 degrees Fahrenheit, creating separate “zones” of high and medium heat using burner temperatures or by piling your charcoal on one side, depending on what sort of BBQ grill you’re using.
- Dry and season your pork chops as described above.
- Sear your chops over high heat, which should take approximately 3 minutes per side.
- Finish cooking your pork chops over medium heat, which should take 4-7 minutes per side.
- Remove your chops when they hit 145 degrees Fahrenheit.
- Let your pork chops “rest” for five minutes, and serve to your delighted guests.
You’ll be surprised at what you can do with pork chops – and how much you’ll love them – provided you cook them to exactly the right temperature. The only way to do this with certainty is to use the best digital meat thermometer, which will take the guesswork out of the process and provide a safer and more delicious grilled pork chop BBQ grilling experience for you and your guests. Make sure you have a good digital thermometer ready before you get started. Have fun, and bon appetit!