
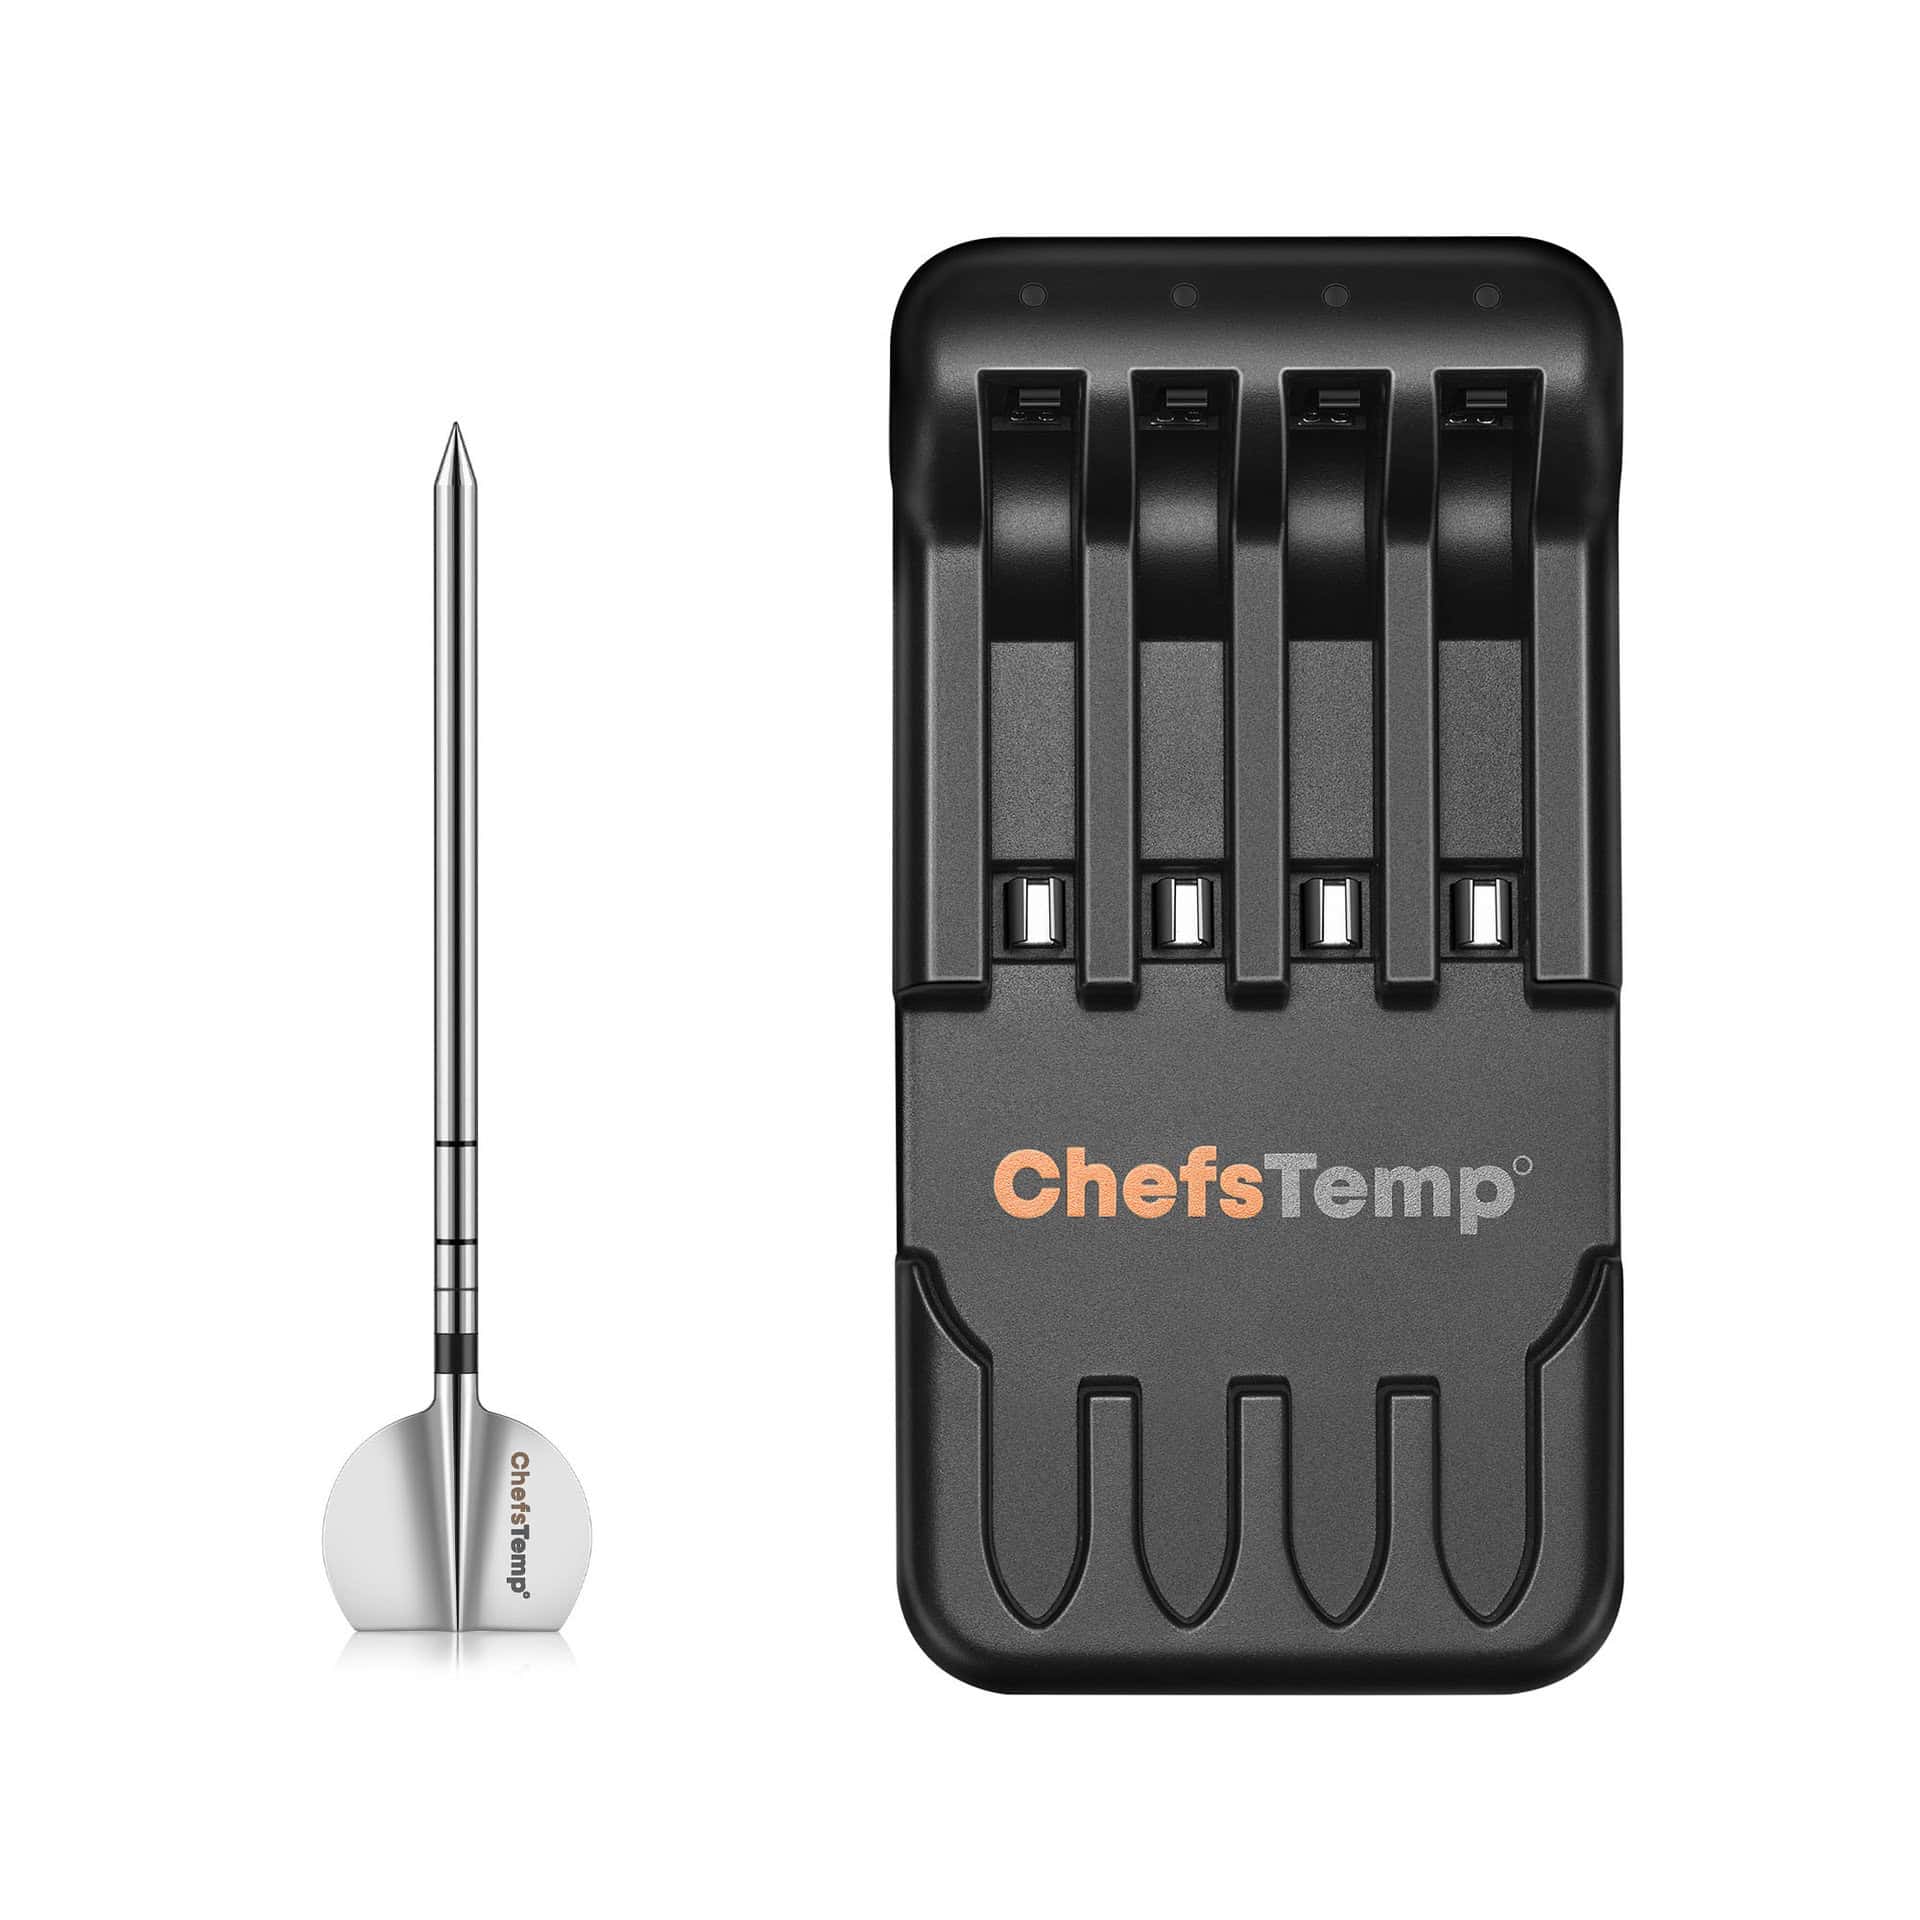
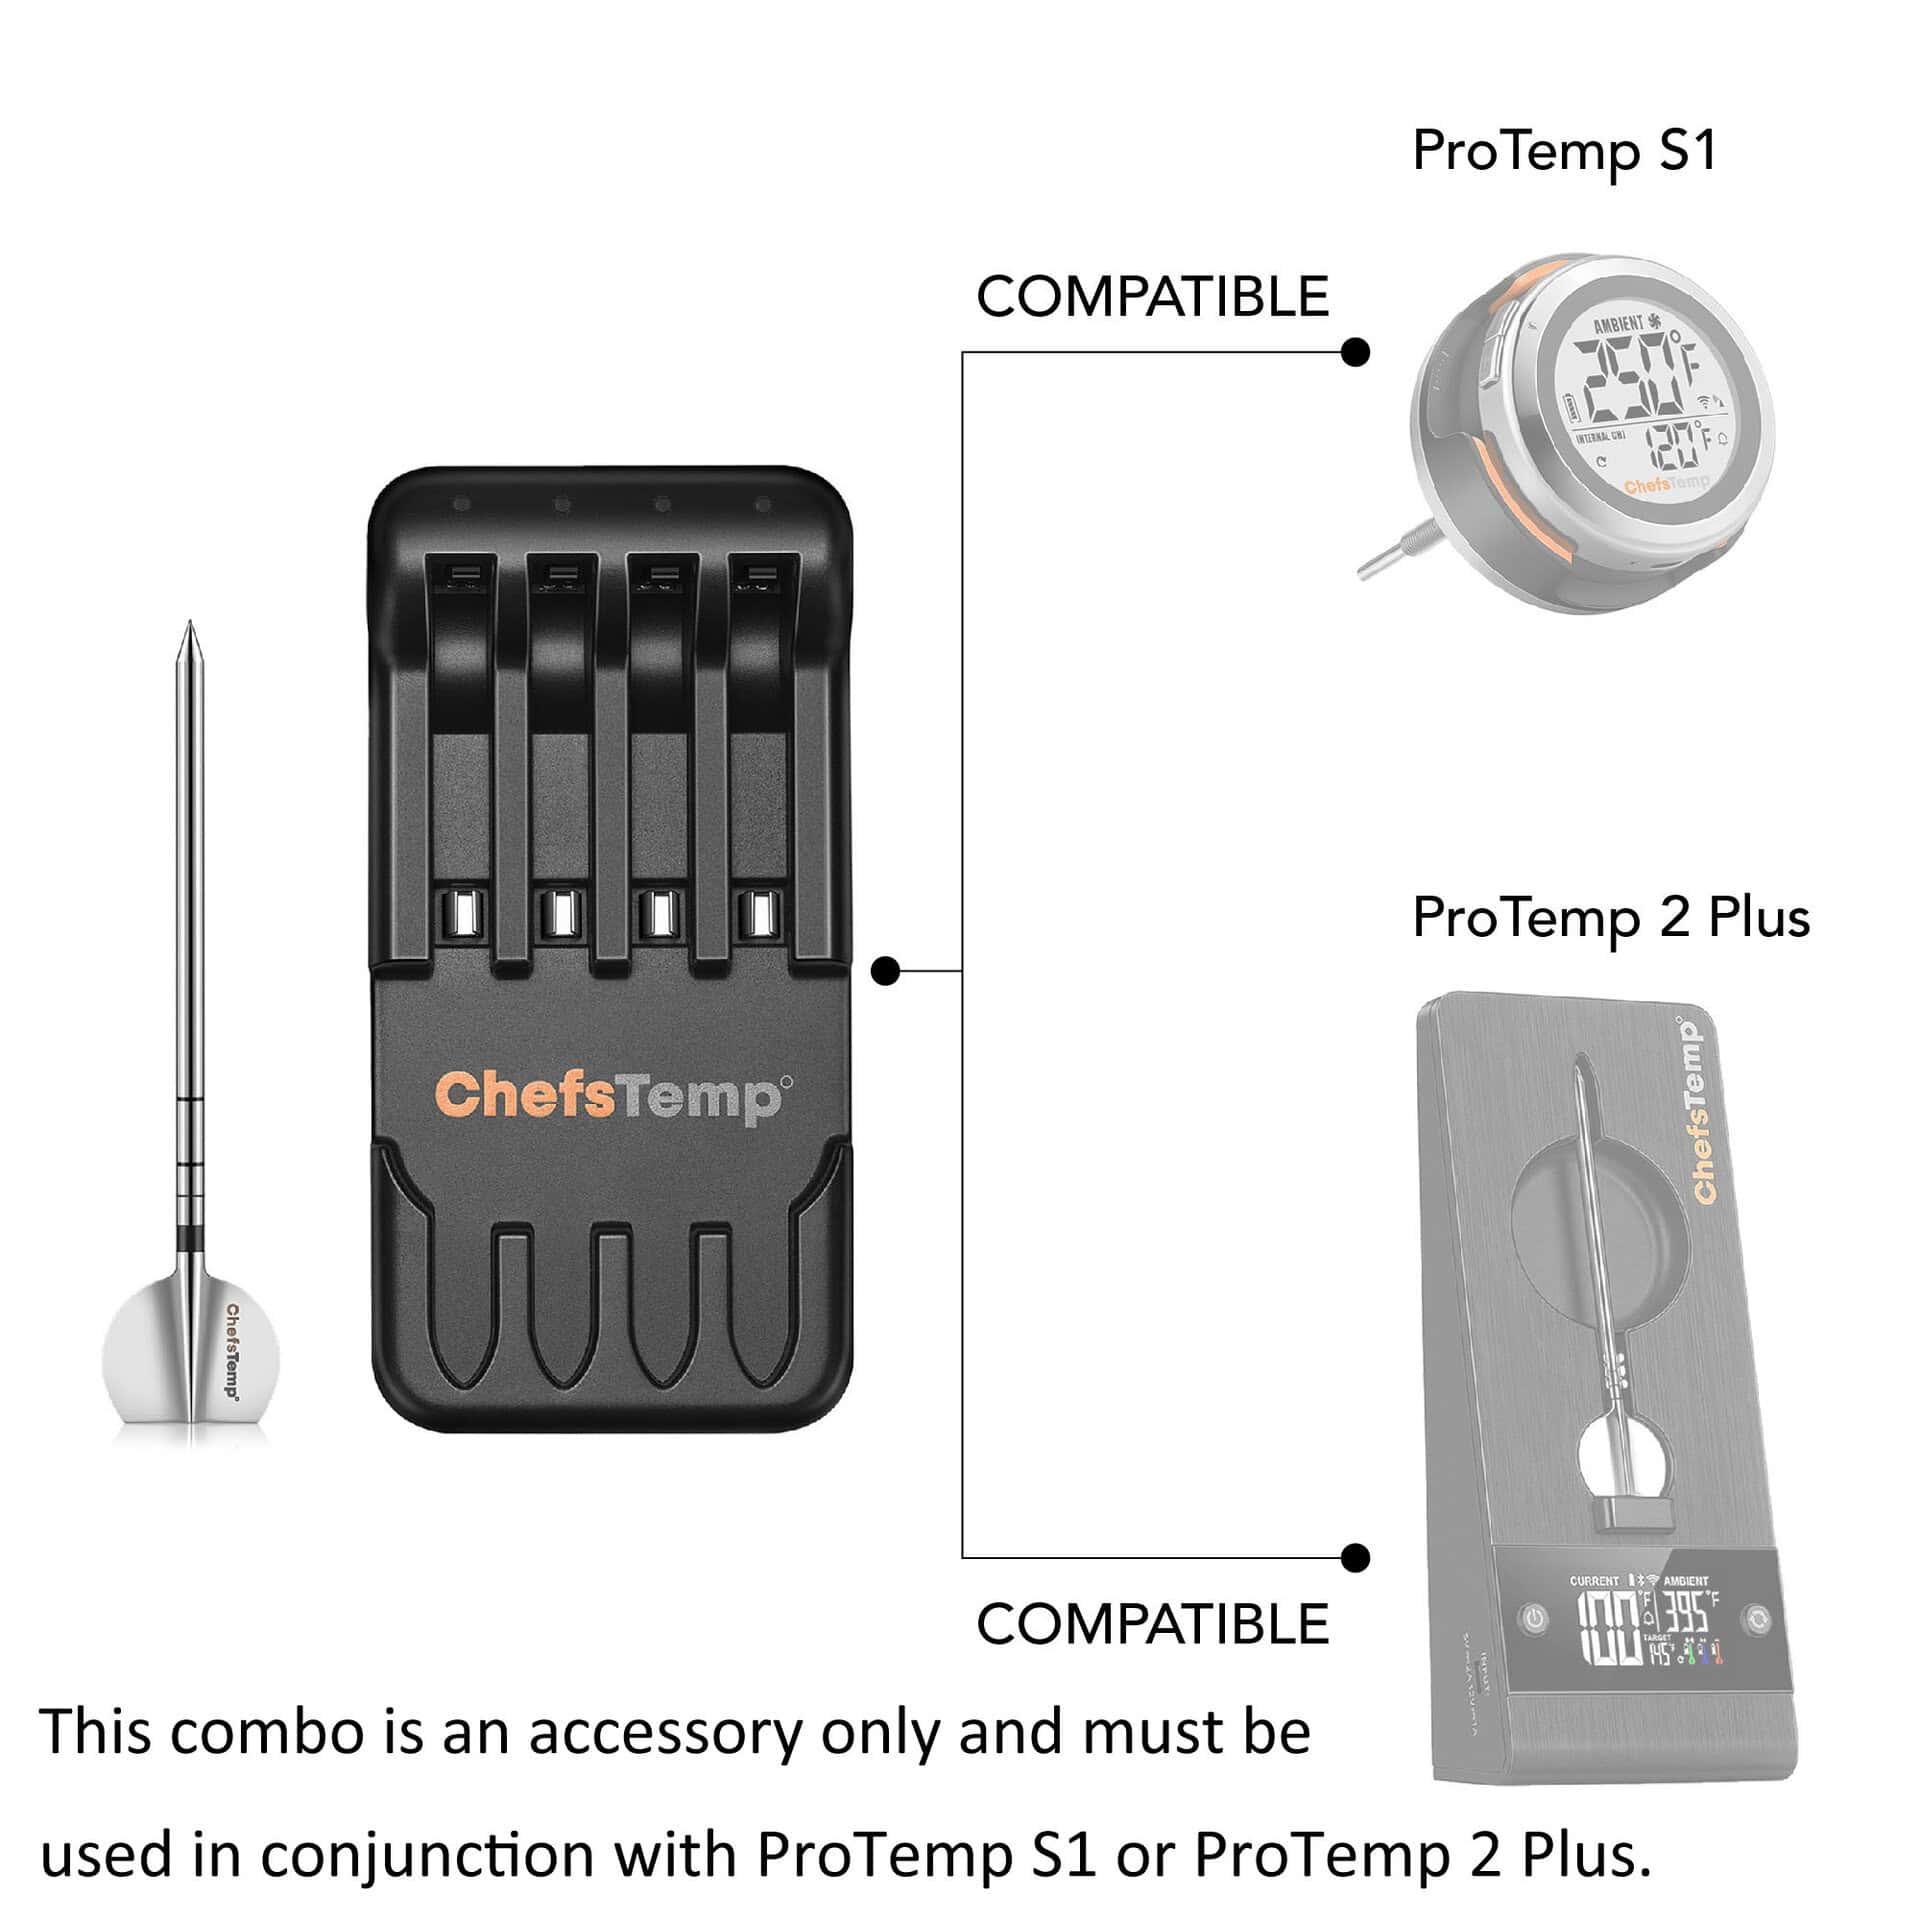

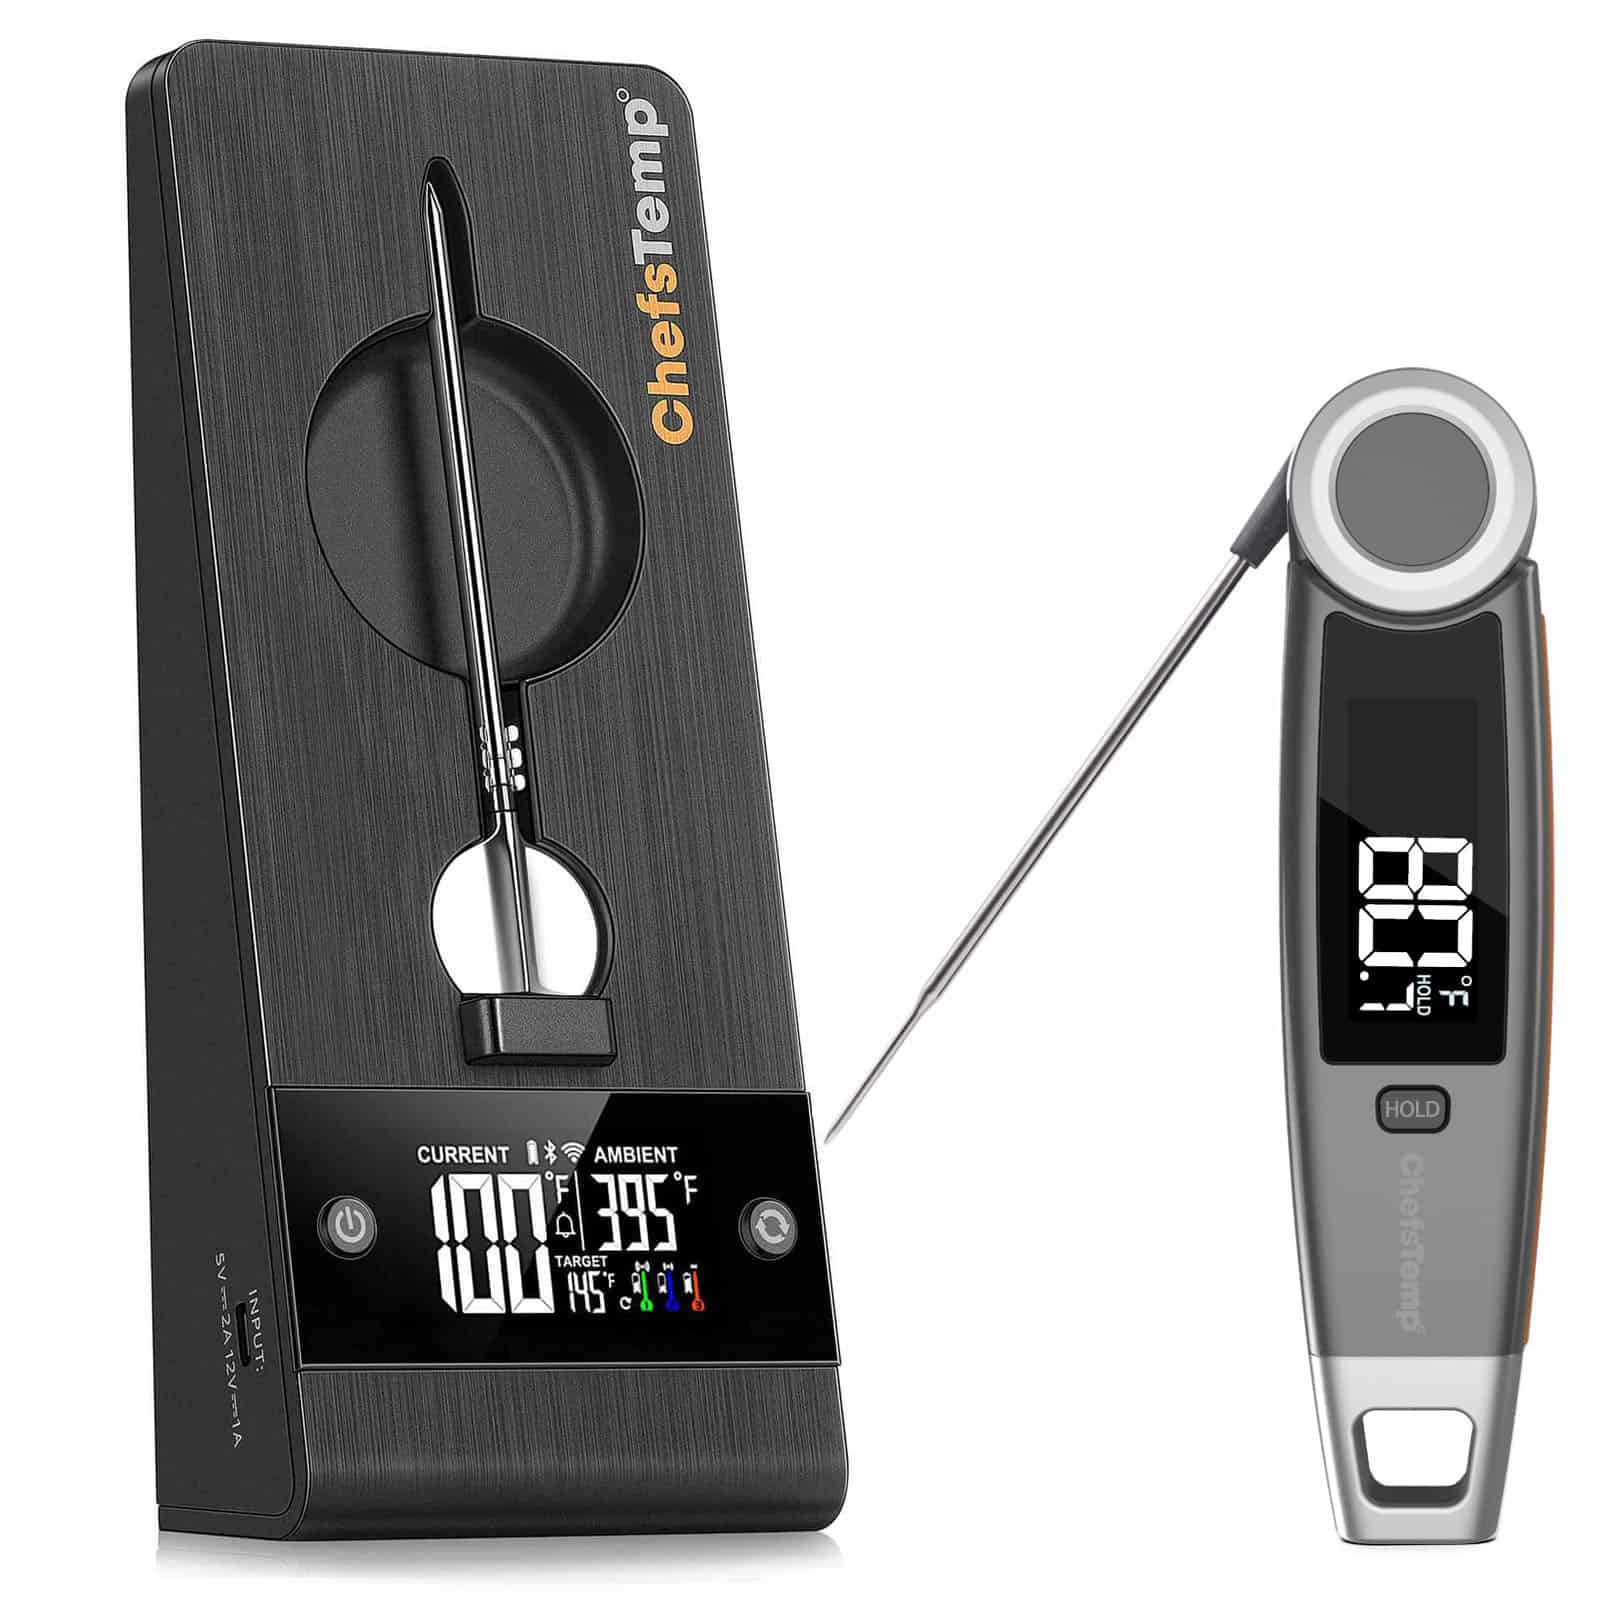
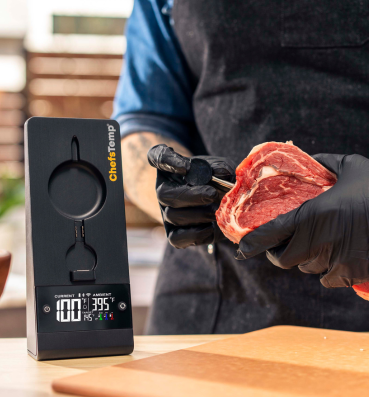
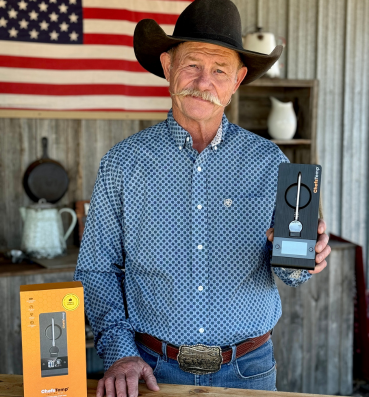
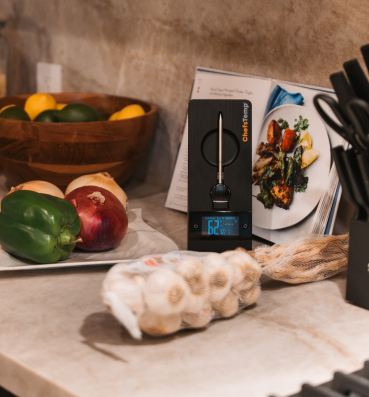
Sonde en 4-in-1 opladercombinatie van de 2e generatie – Vervangend accessoire voor ProTemp S1 of ProTemp 2 Plus (Vereist ProTemp S1/2 Plus – Kan niet los gebruikt worden!)
$49.99 $217.95Prijsklasse: $49.99 tot $217.95
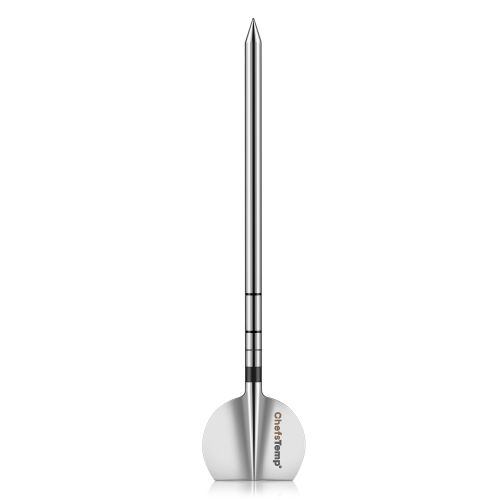
Specificaties van de sonde:
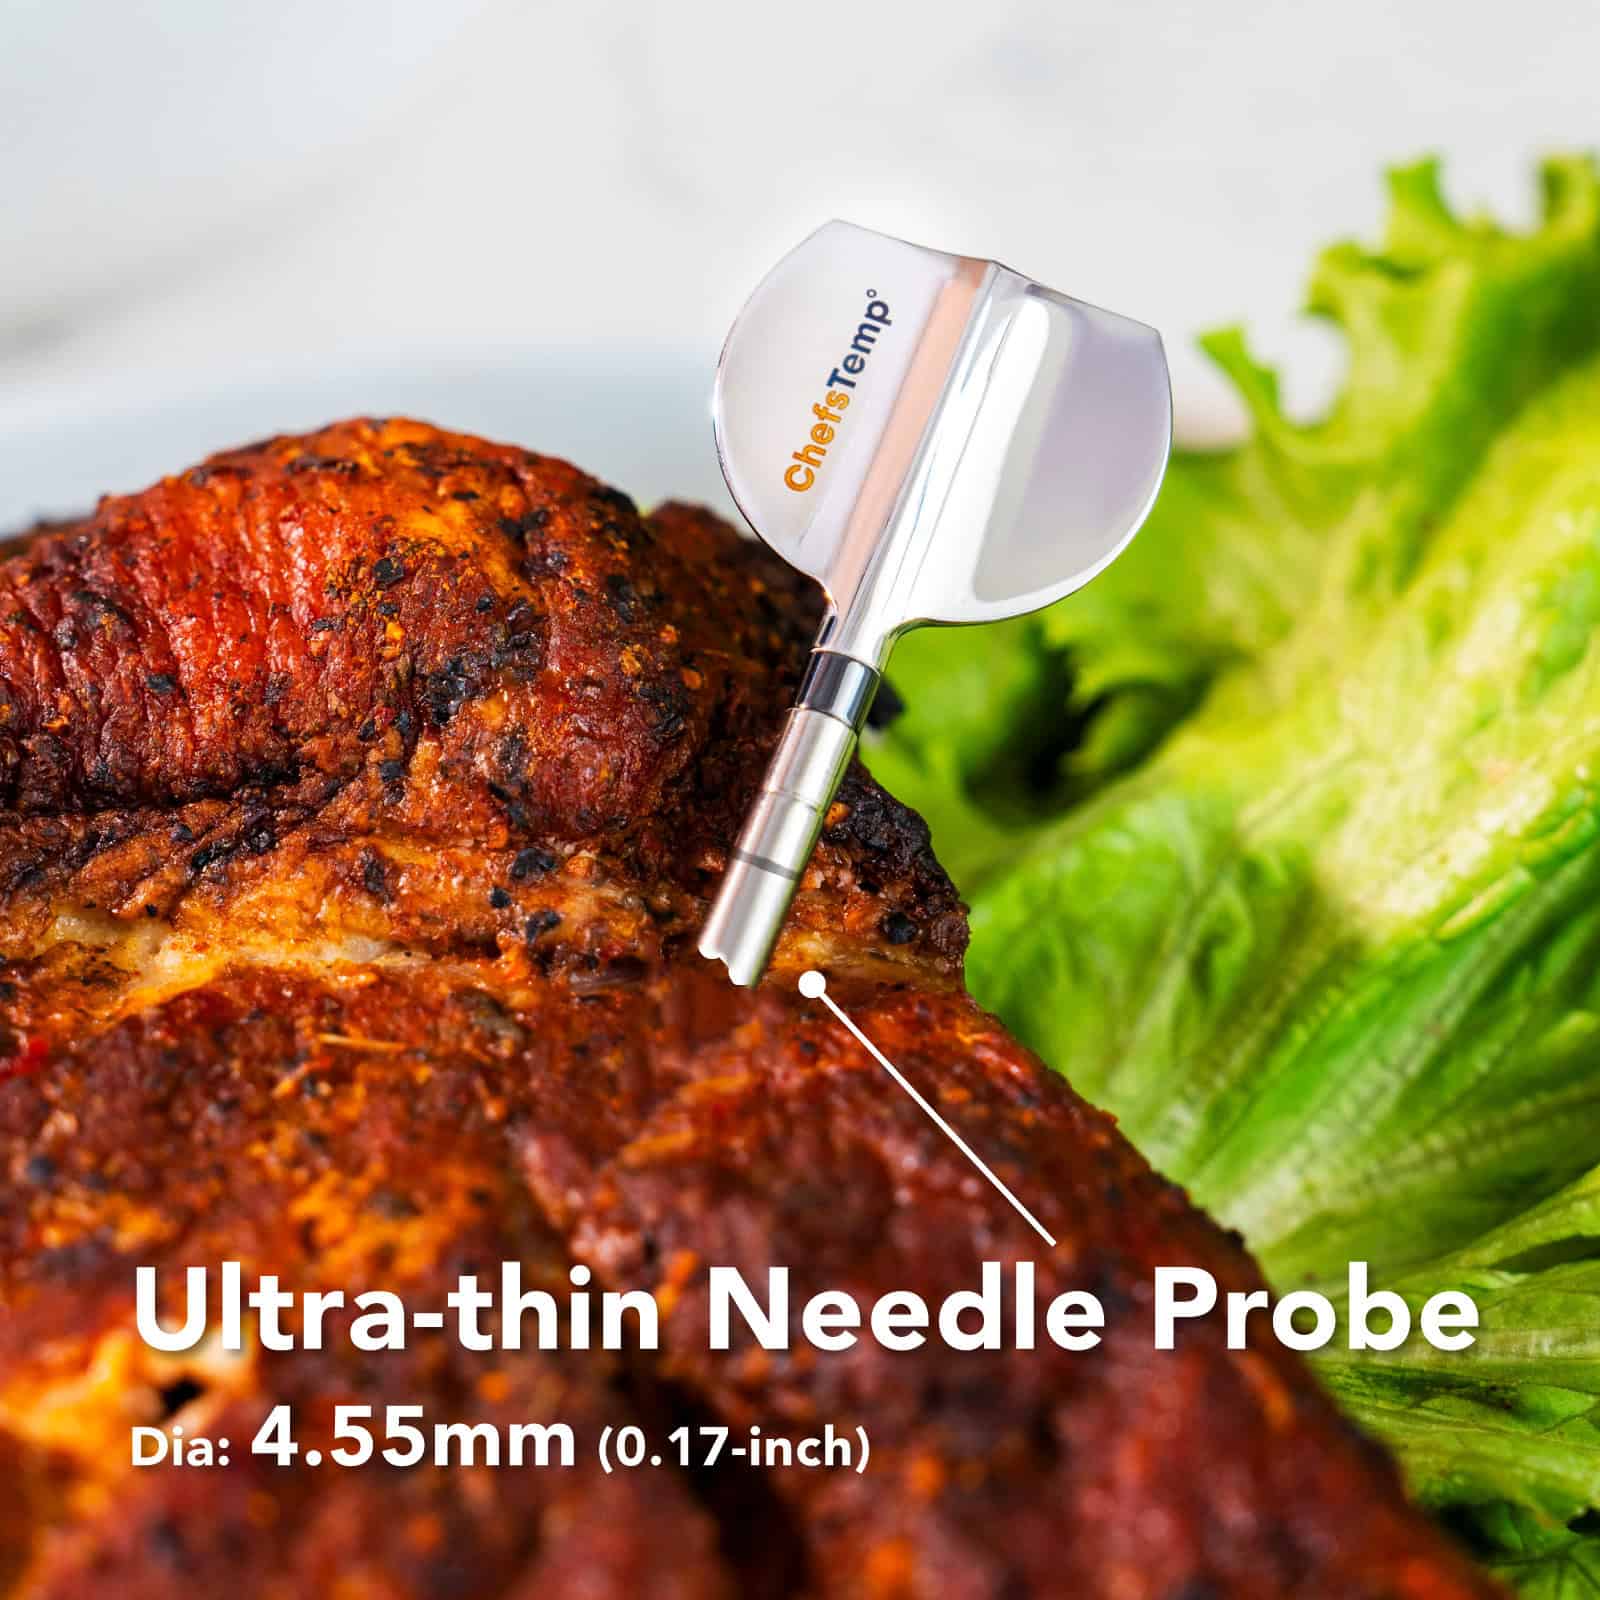
- Afmetingen van de sonde: 4,92 × 1,10 × 0,17 inch (125 × 28 × 4,55 mm)
- Diameter: 0,17 inch (4,55 mm)
- Nauwkeurigheid: ±0,9 °F (±0,5 °C)
- Temperatuurbereik van de sonde: 0 °C – 105 °C (32 °F – 220 °F) Bestand tegen temperaturen tot 105 °C (221 °F)
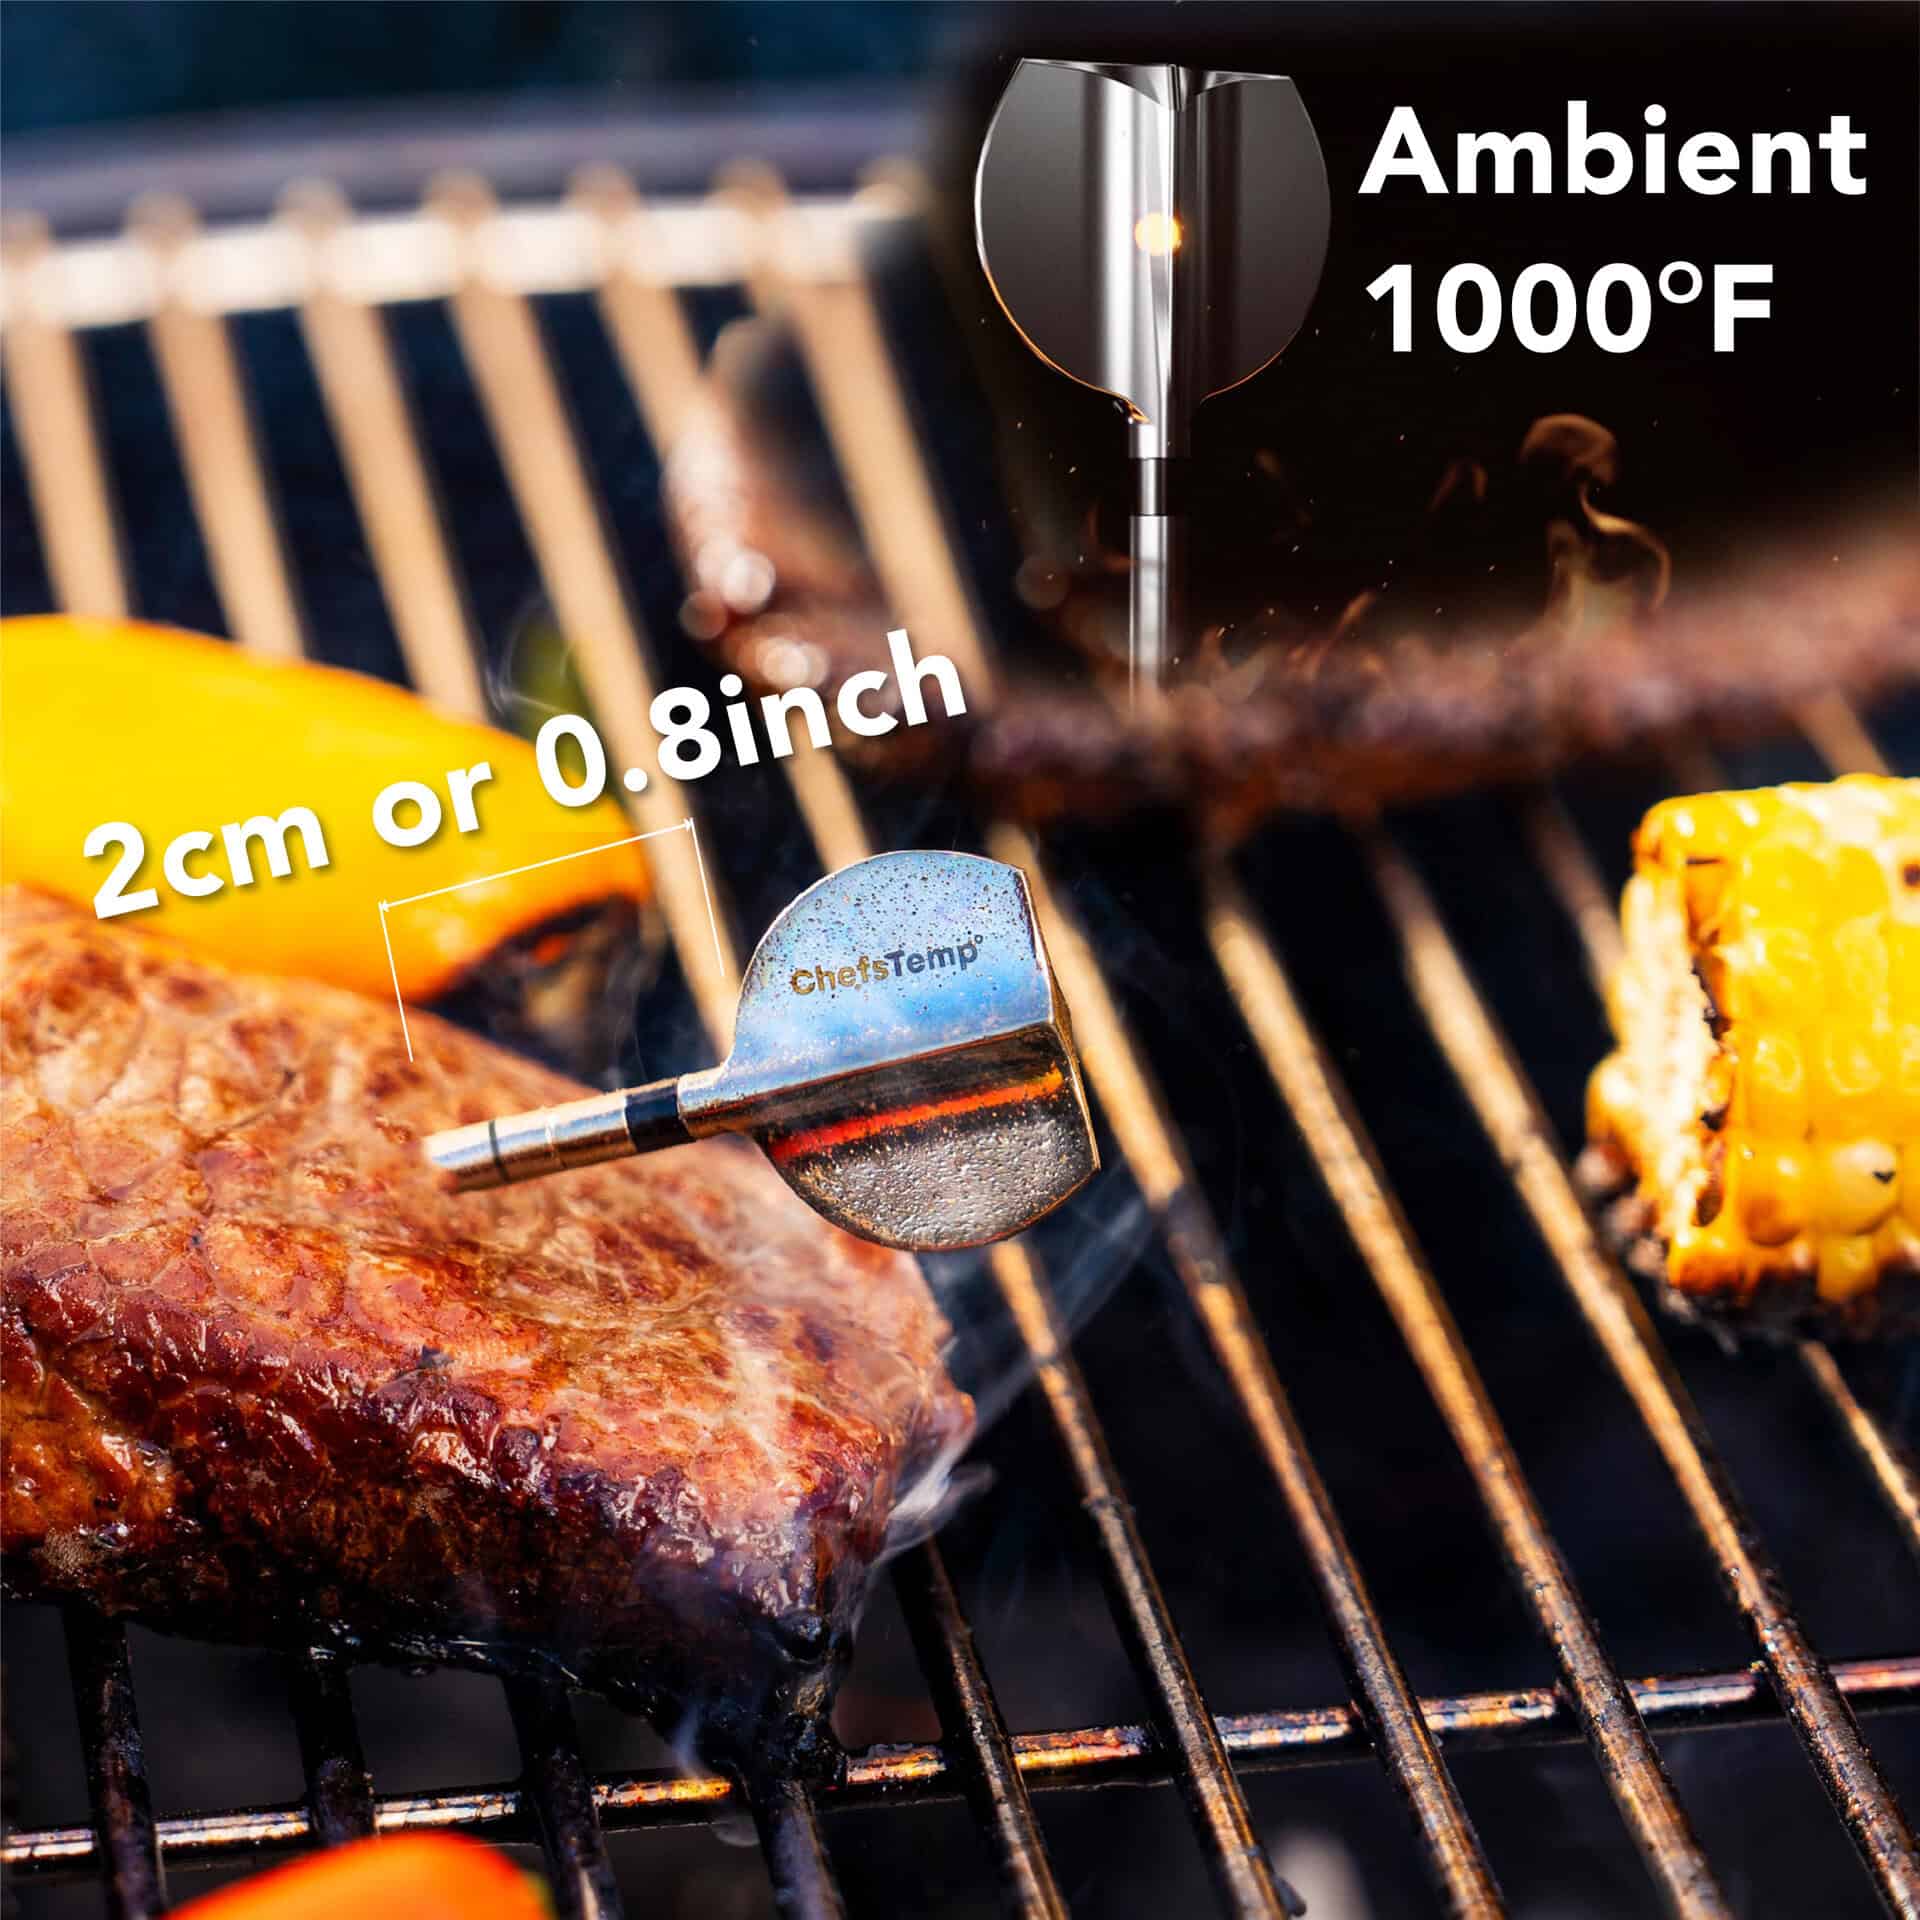
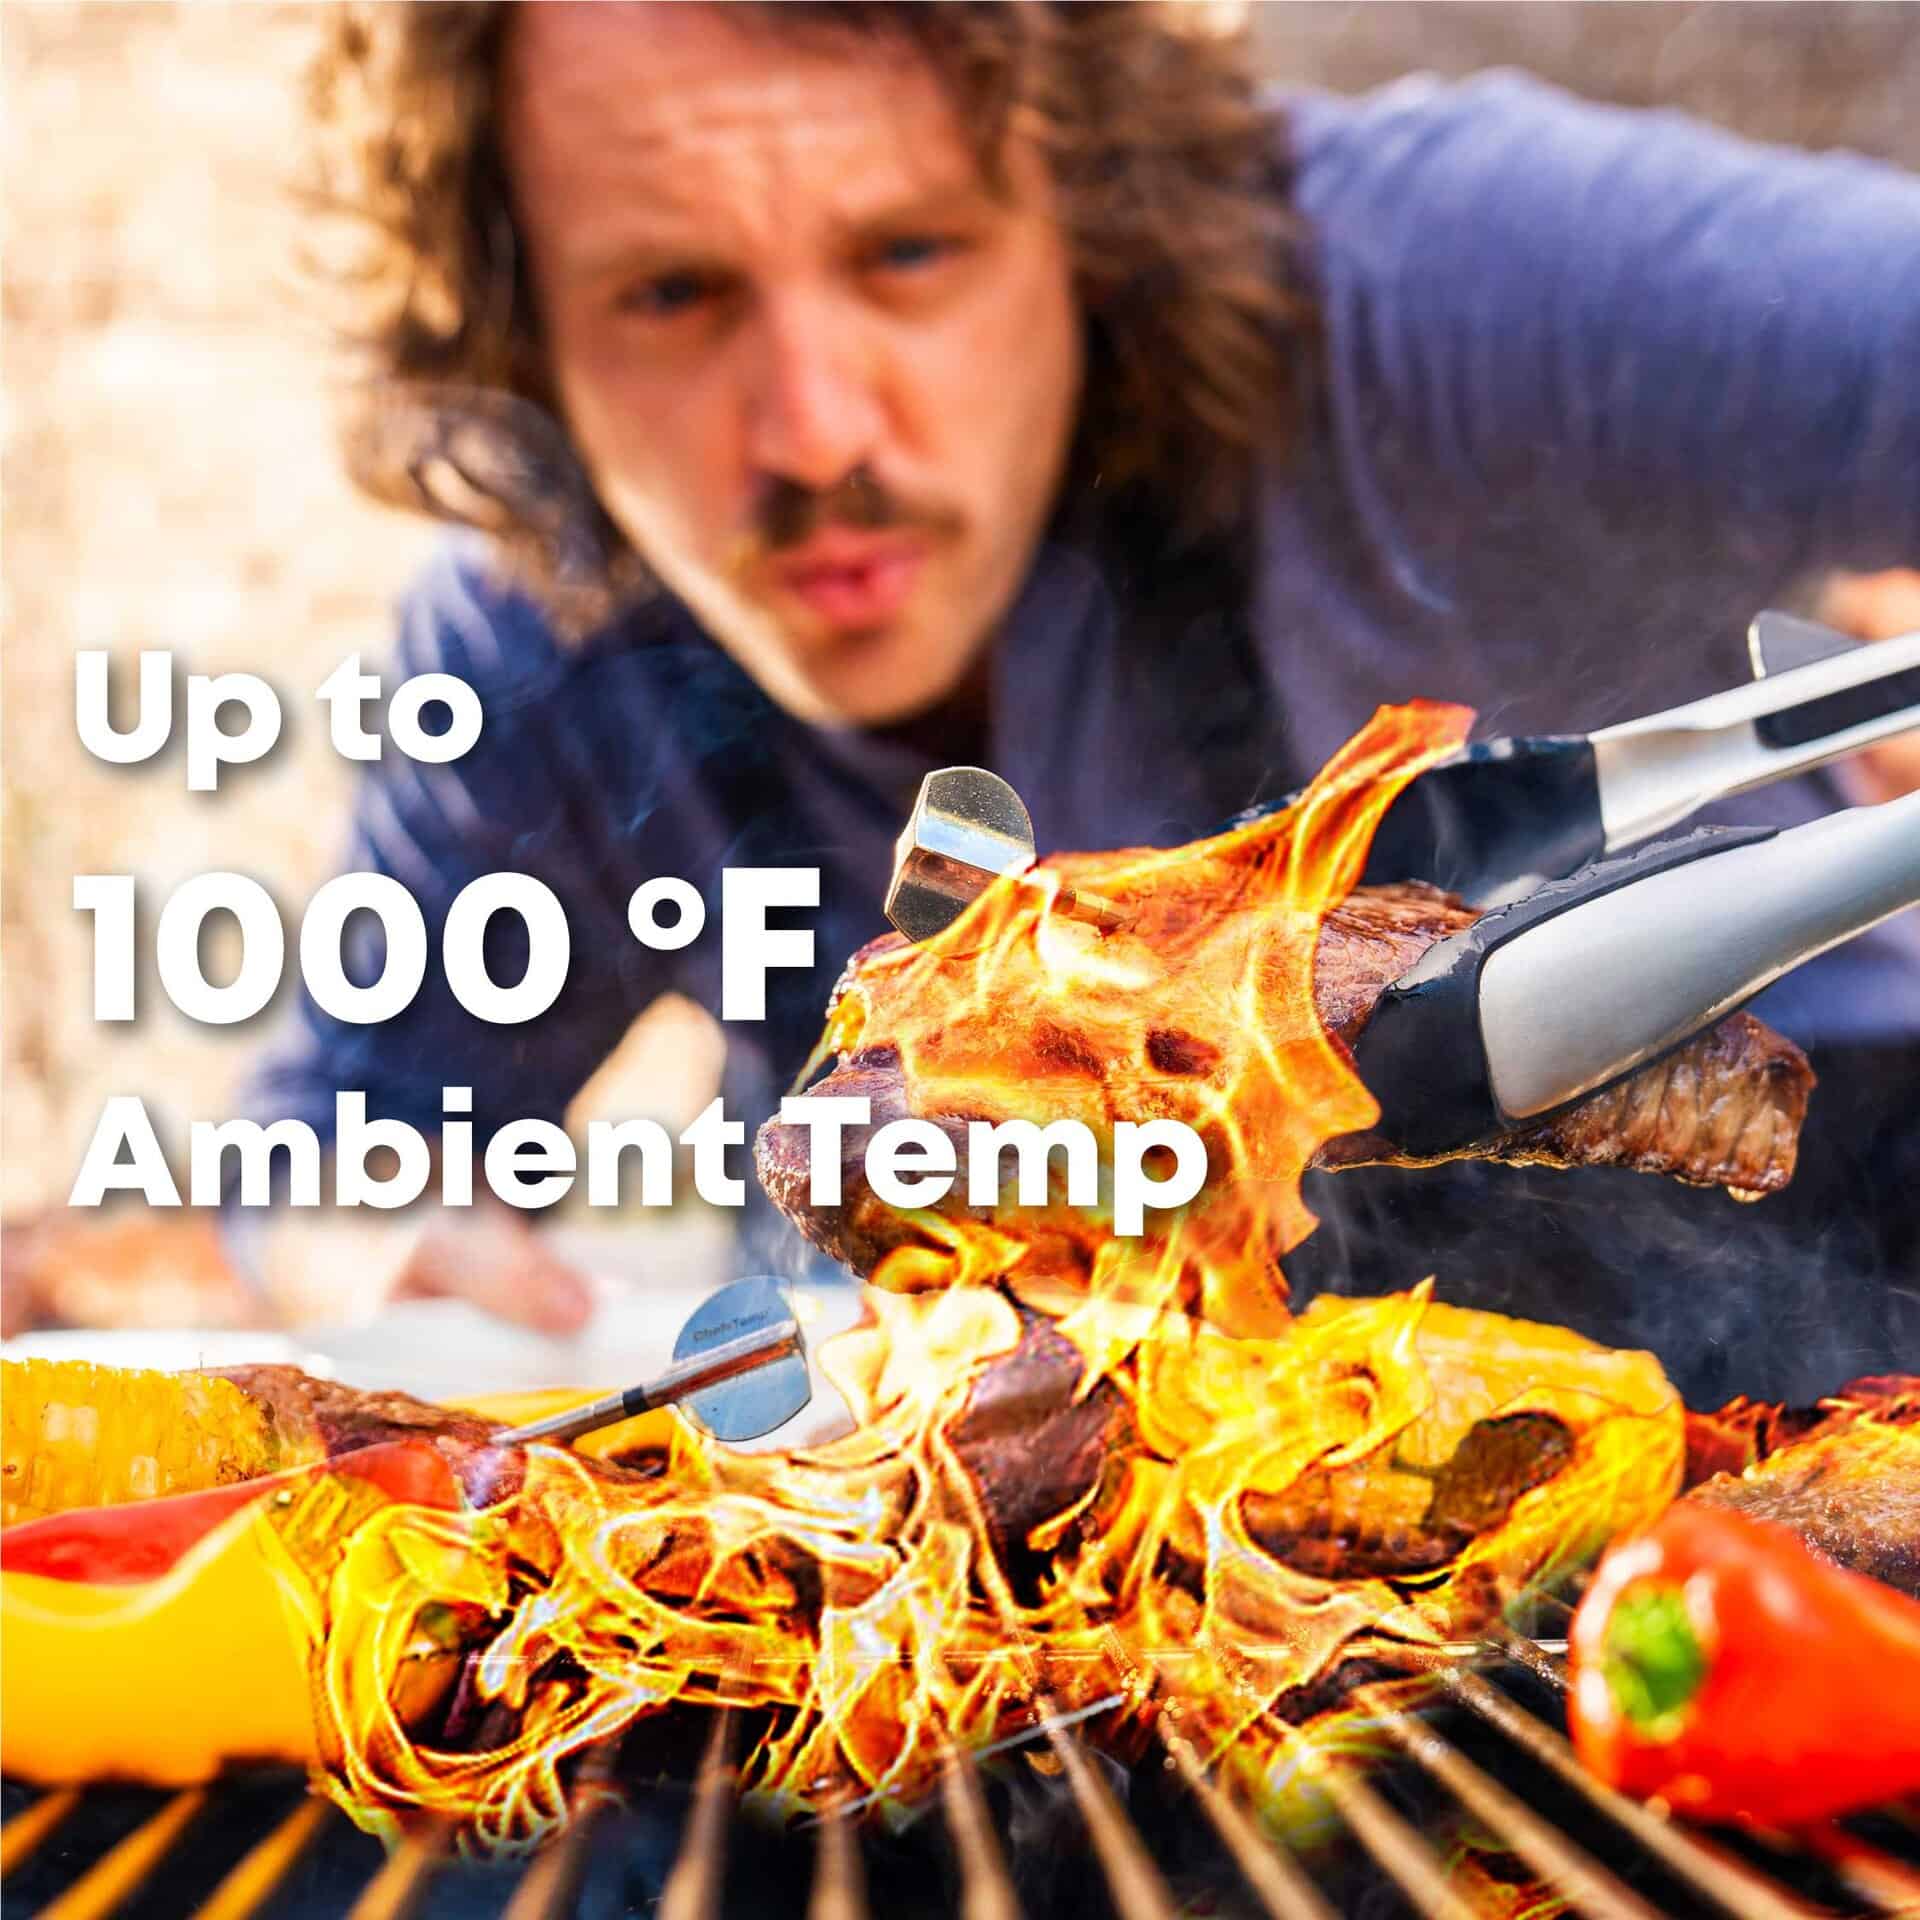
- Omgevingstemperatuurbereik: 50°C – 530°C (122°F – 1000°F) Bestand tegen temperaturen tot 530°C (1000°F)
- Waterdichtheidsklasse van de sonde: IP68
- Materiaal: roestvrij staal van klasse 316
- Batterijduur van de sonde: tot 30 uur
- Kan worden aangesloten op ProTemp S1 en ProTemp 2 Plus, en kan ook worden opgeladen via de ChefsTemp 4-in-1 oplader.
- Volledig opgeladen in slechts 10-15 minuten: We raden aan de sonde voor elk gebruik volledig op te laden.
- Belangrijk: Dit product is een accessoire. Controleer of u al een ProTemp S1 of ProTemp 2 Plus bezit voordat u dit product aanschaft. Het is niet aan te raden dit product te gebruiken voor de originele ProTemp Plus, omdat het mogelijk niet compatibel is.
productkenmerken
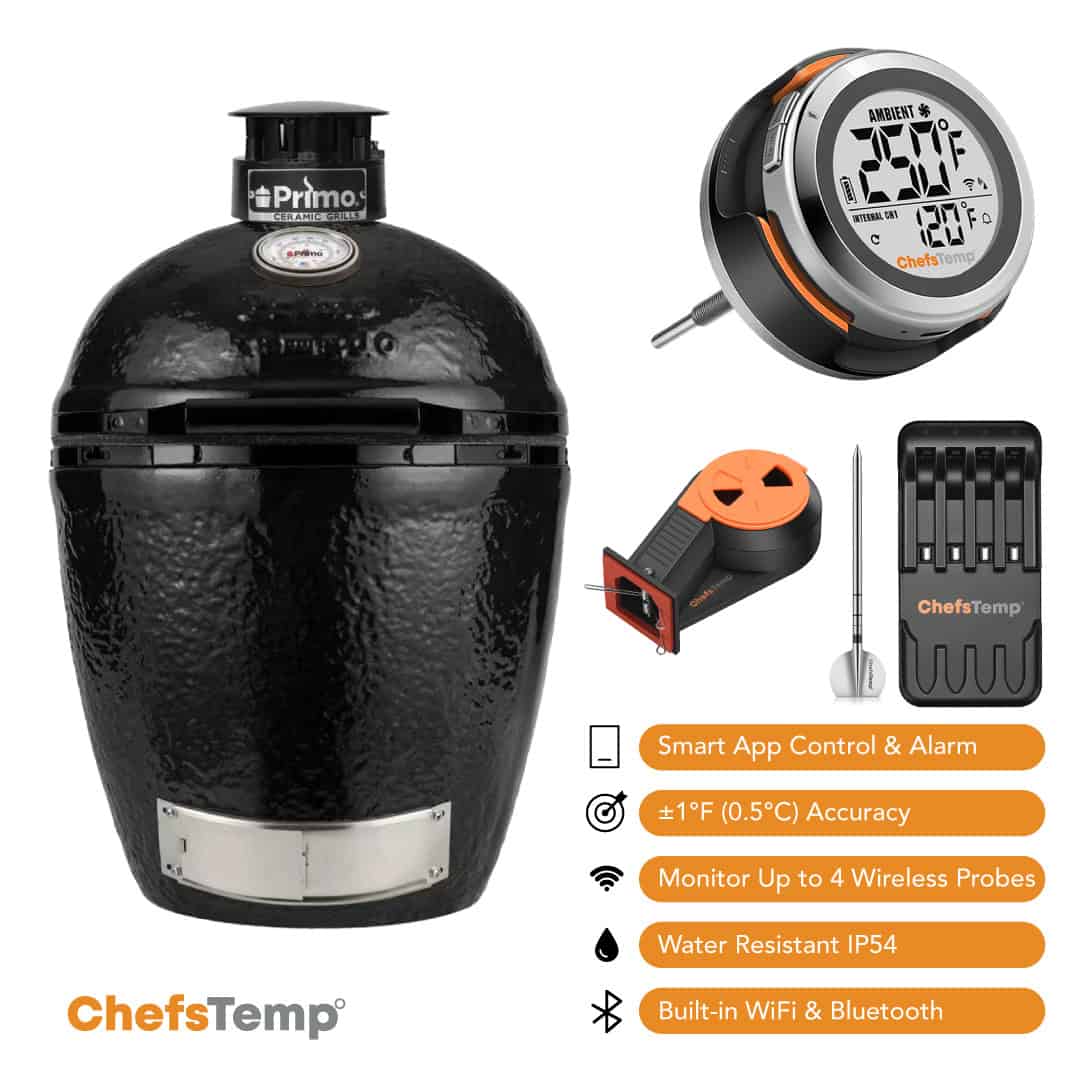
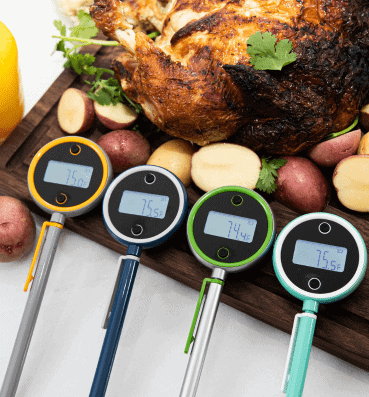
Ultradunne sonde en lange batterijduur: De ultradunne naald van 0,17 inch (4,55 mm) laat vrijwel geen sporen achter op uw voedsel. De ingebouwde batterij gaat tot 30 uur mee op één lading.
Hoogwaardig 316 roestvrij staal: Biedt superieure corrosiebestendigheid tegen zuren, vocht en vetten – veel beter dan 304 – en is NSF/ANSI-gecertificeerd voor gebruik in de voedingsindustrie om metaalafgifte te voorkomen, wat veilige, hygiënische en langdurige prestaties garandeert.
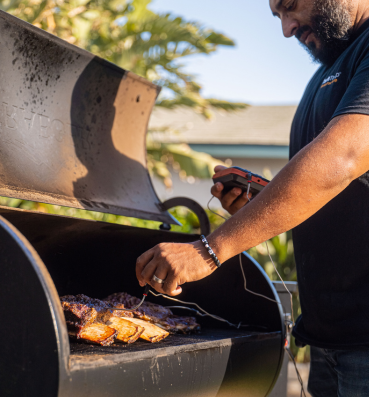
Duurzaamheid bij hoge temperaturen: Bestand tegen omgevingstemperaturen tot 530 °C (1000 °F) en interne voedseltemperaturen tot 105 °C (221 °F). Ideaal voor grillen, frituren, roken en meer.
Snel opladenDe batterij is in slechts 10-15 minuten volledig opgeladen. We raden aan de batterij voor elk gebruik volledig op te laden. (Let op: Overladen kan de levensduur van de batterij verkorten. Omdat de sonde geen aan/uit-knop heeft, loopt de batterij vanzelf langzaam leeg wanneer deze niet in gebruik is. Als de batterij volledig leeg is, laad deze dan gewoon weer op tot 100% voordat u weer gaat koken.)
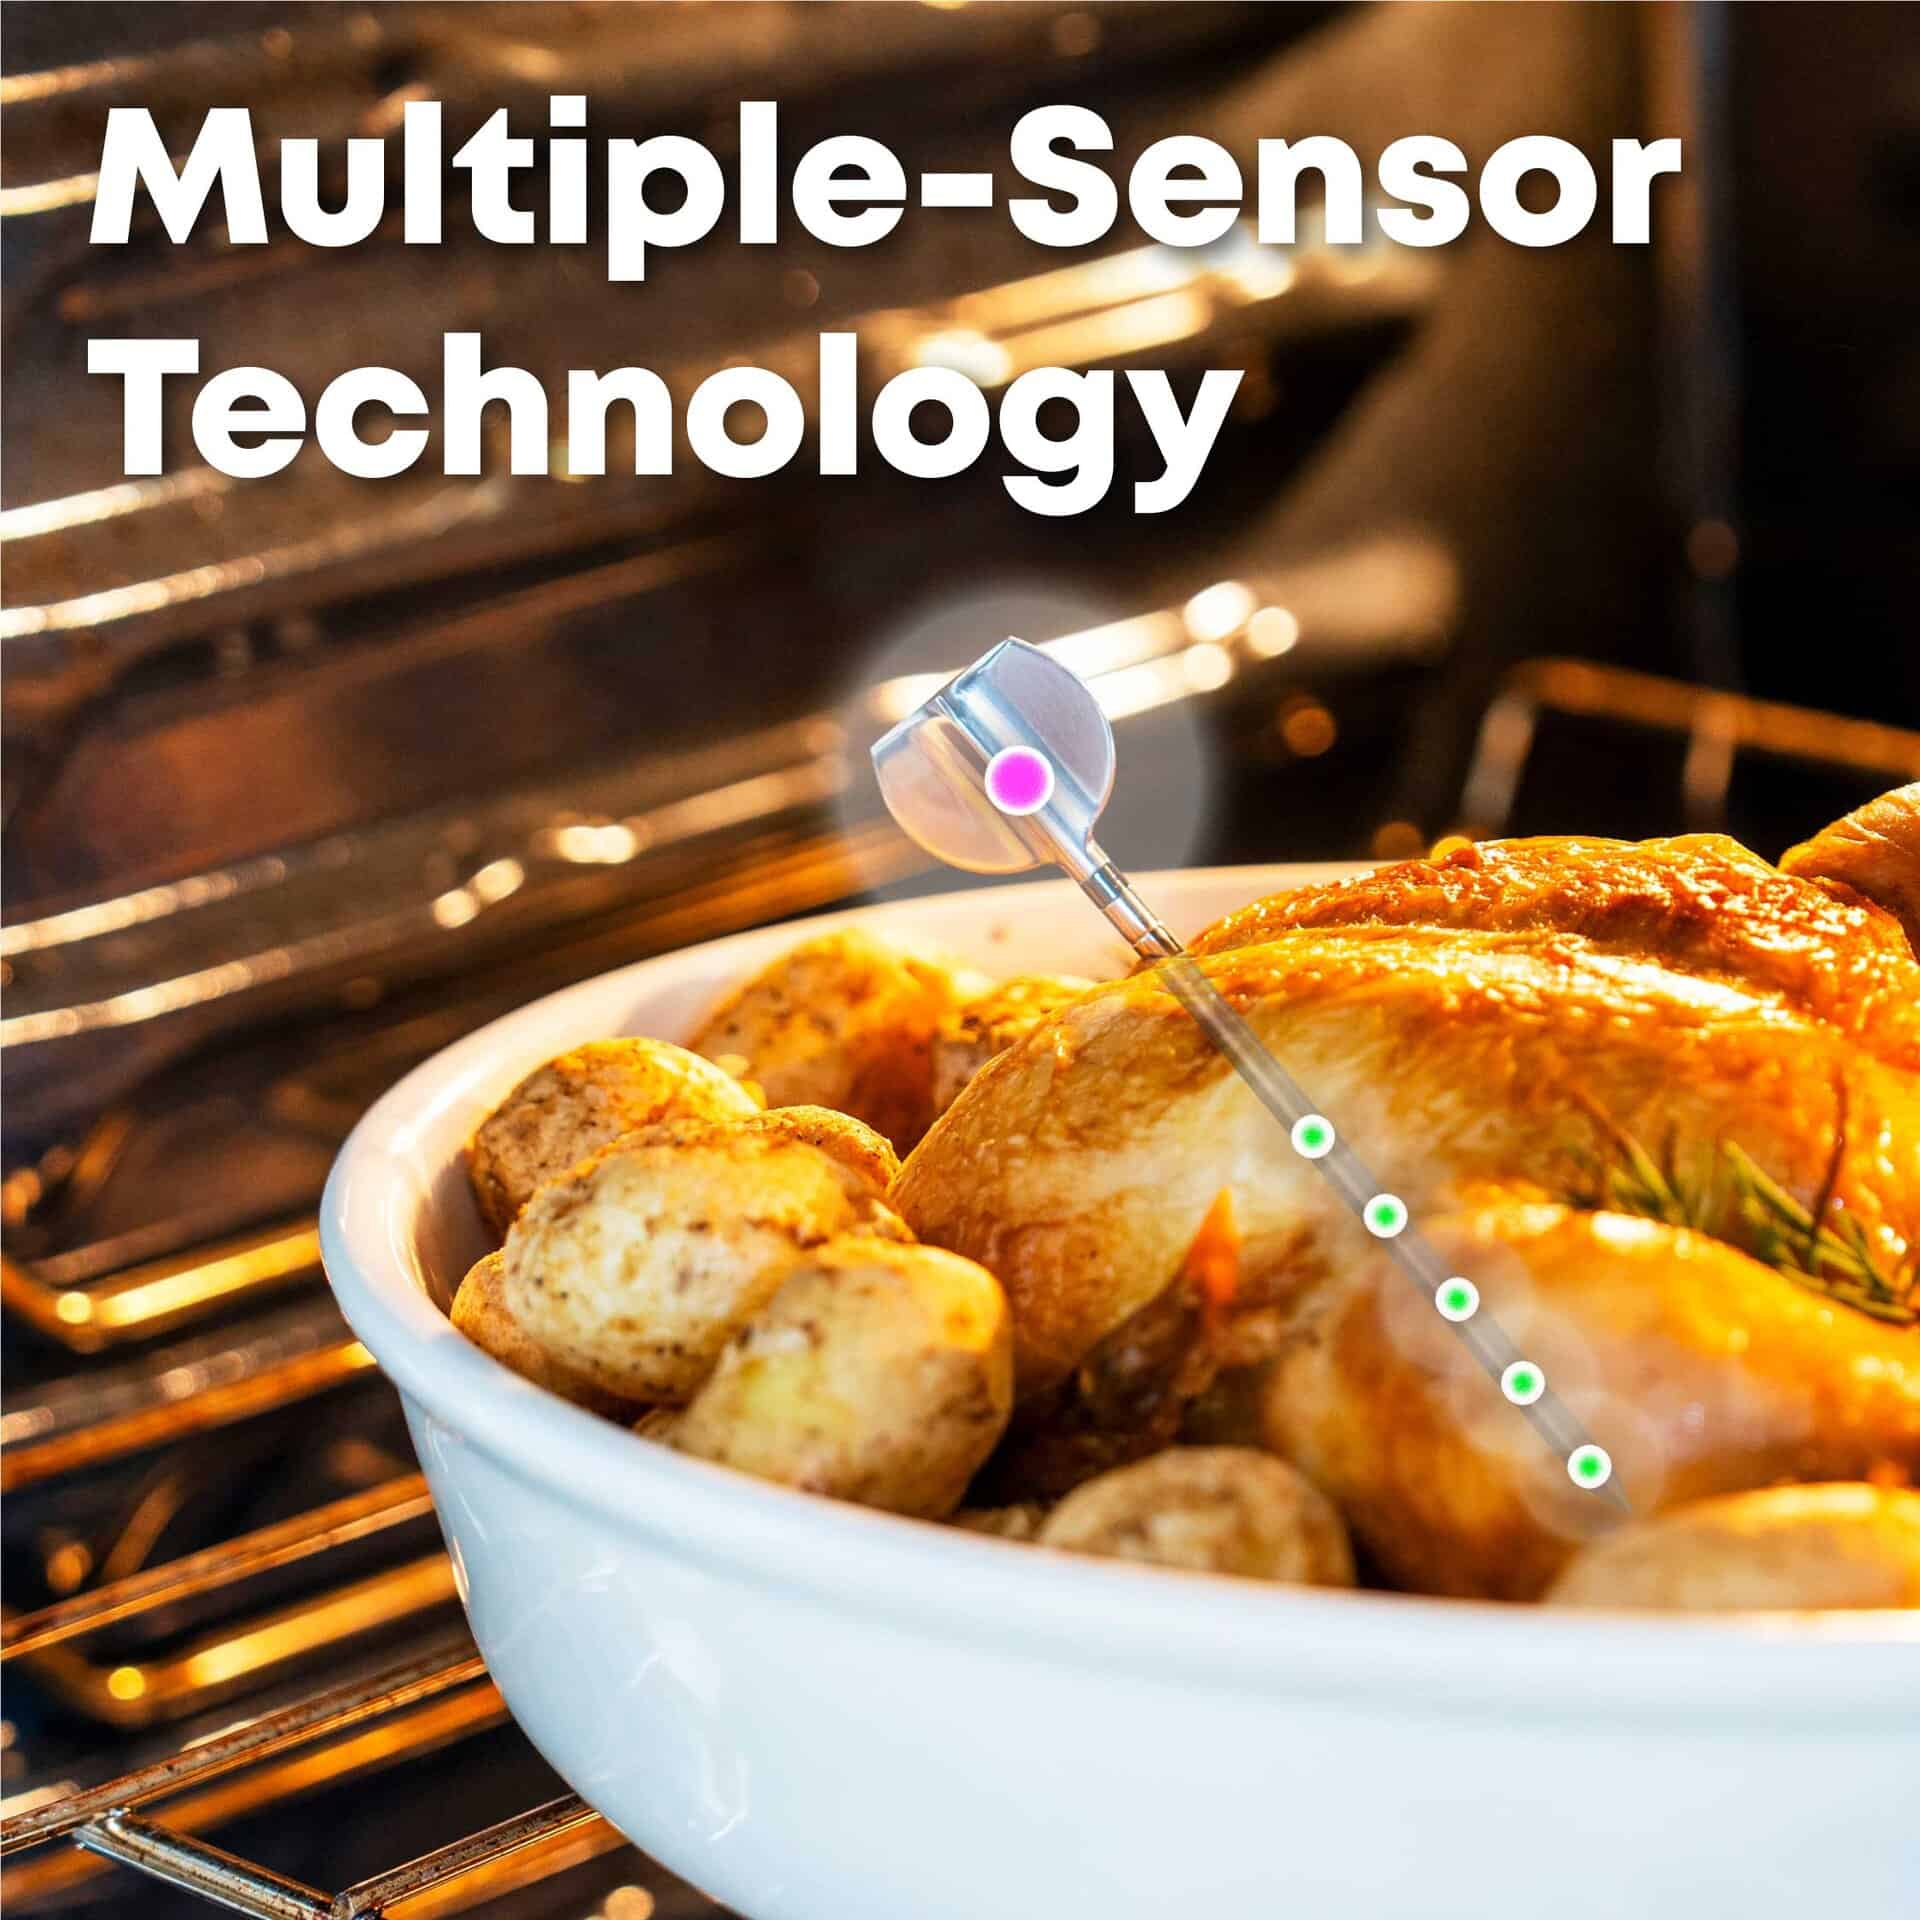
Precisie met meerdere sensoren: Vijf sensoren aan de punt meten de interne temperatuur van het voedsel uiterst nauwkeurig. Eén sensor op het handvat meet de omgevingstemperatuur (grill/oven) in realtime.
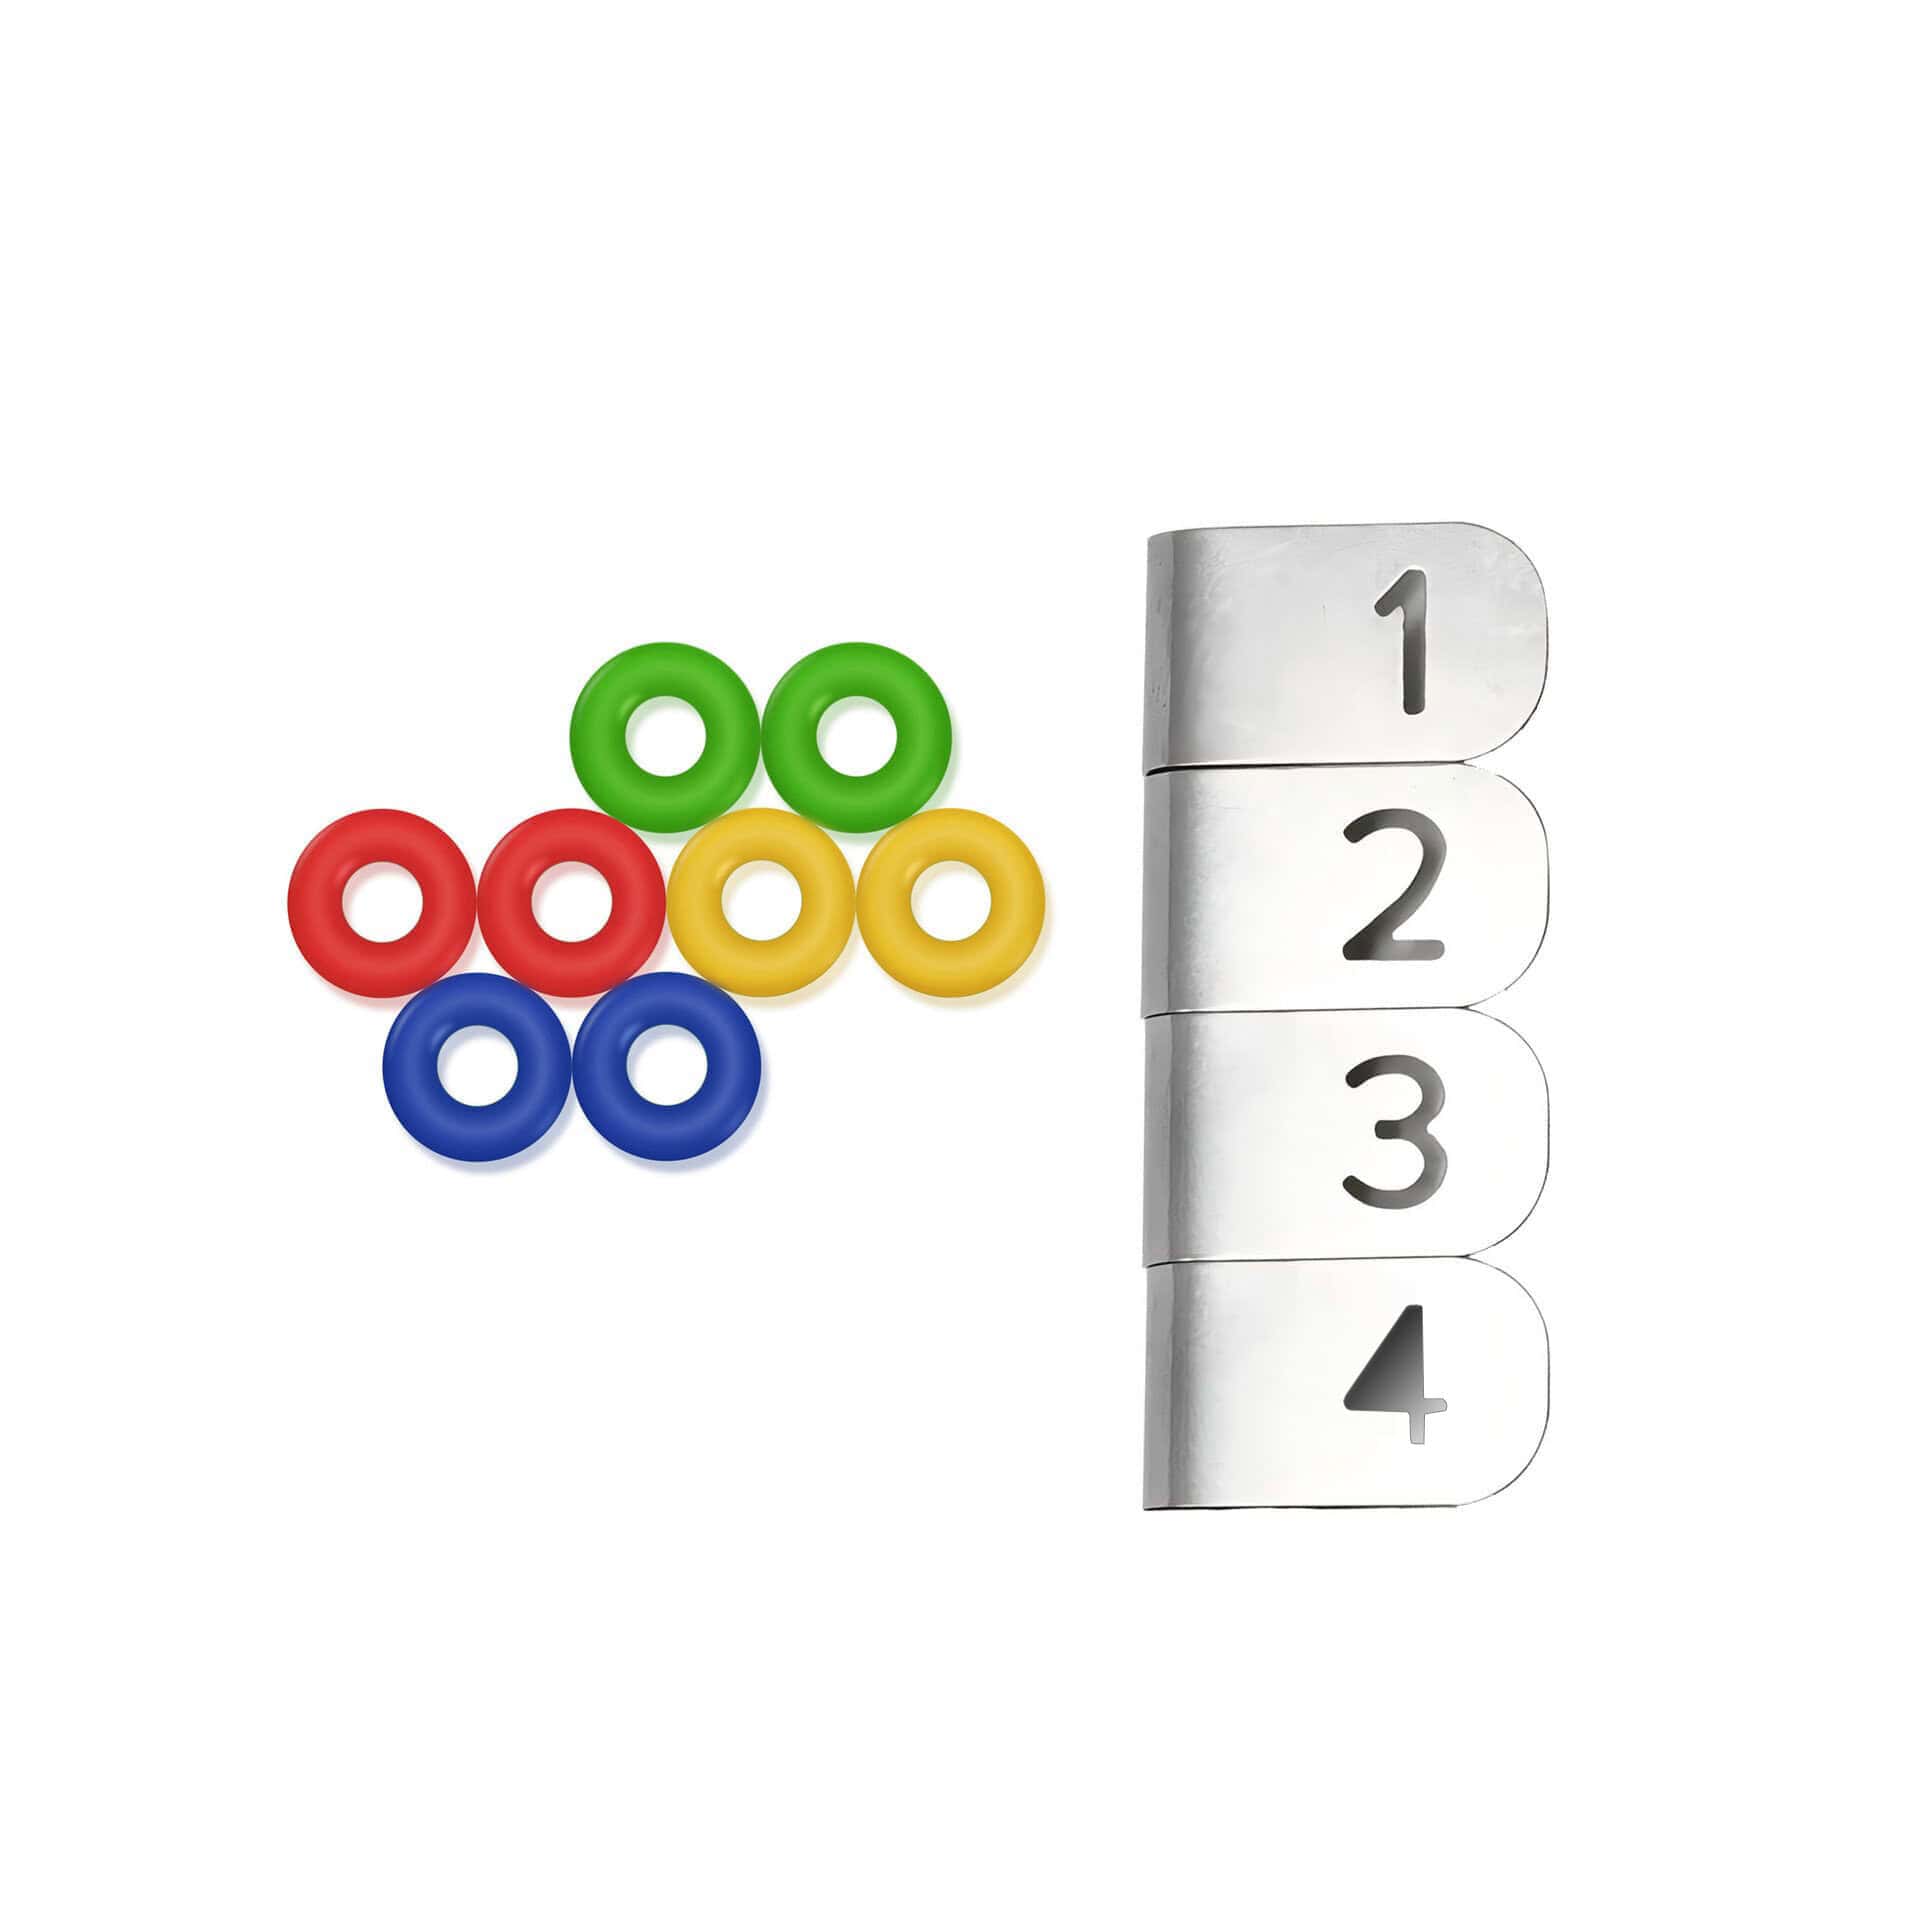
Sondenummerclips: Metalen clipjes met de nummers 1–4 klikken vast op de sondes voor directe kanaalidentificatie. Diameter: 4 mm; compatibel met de 2e generatie nieuwe sonde.
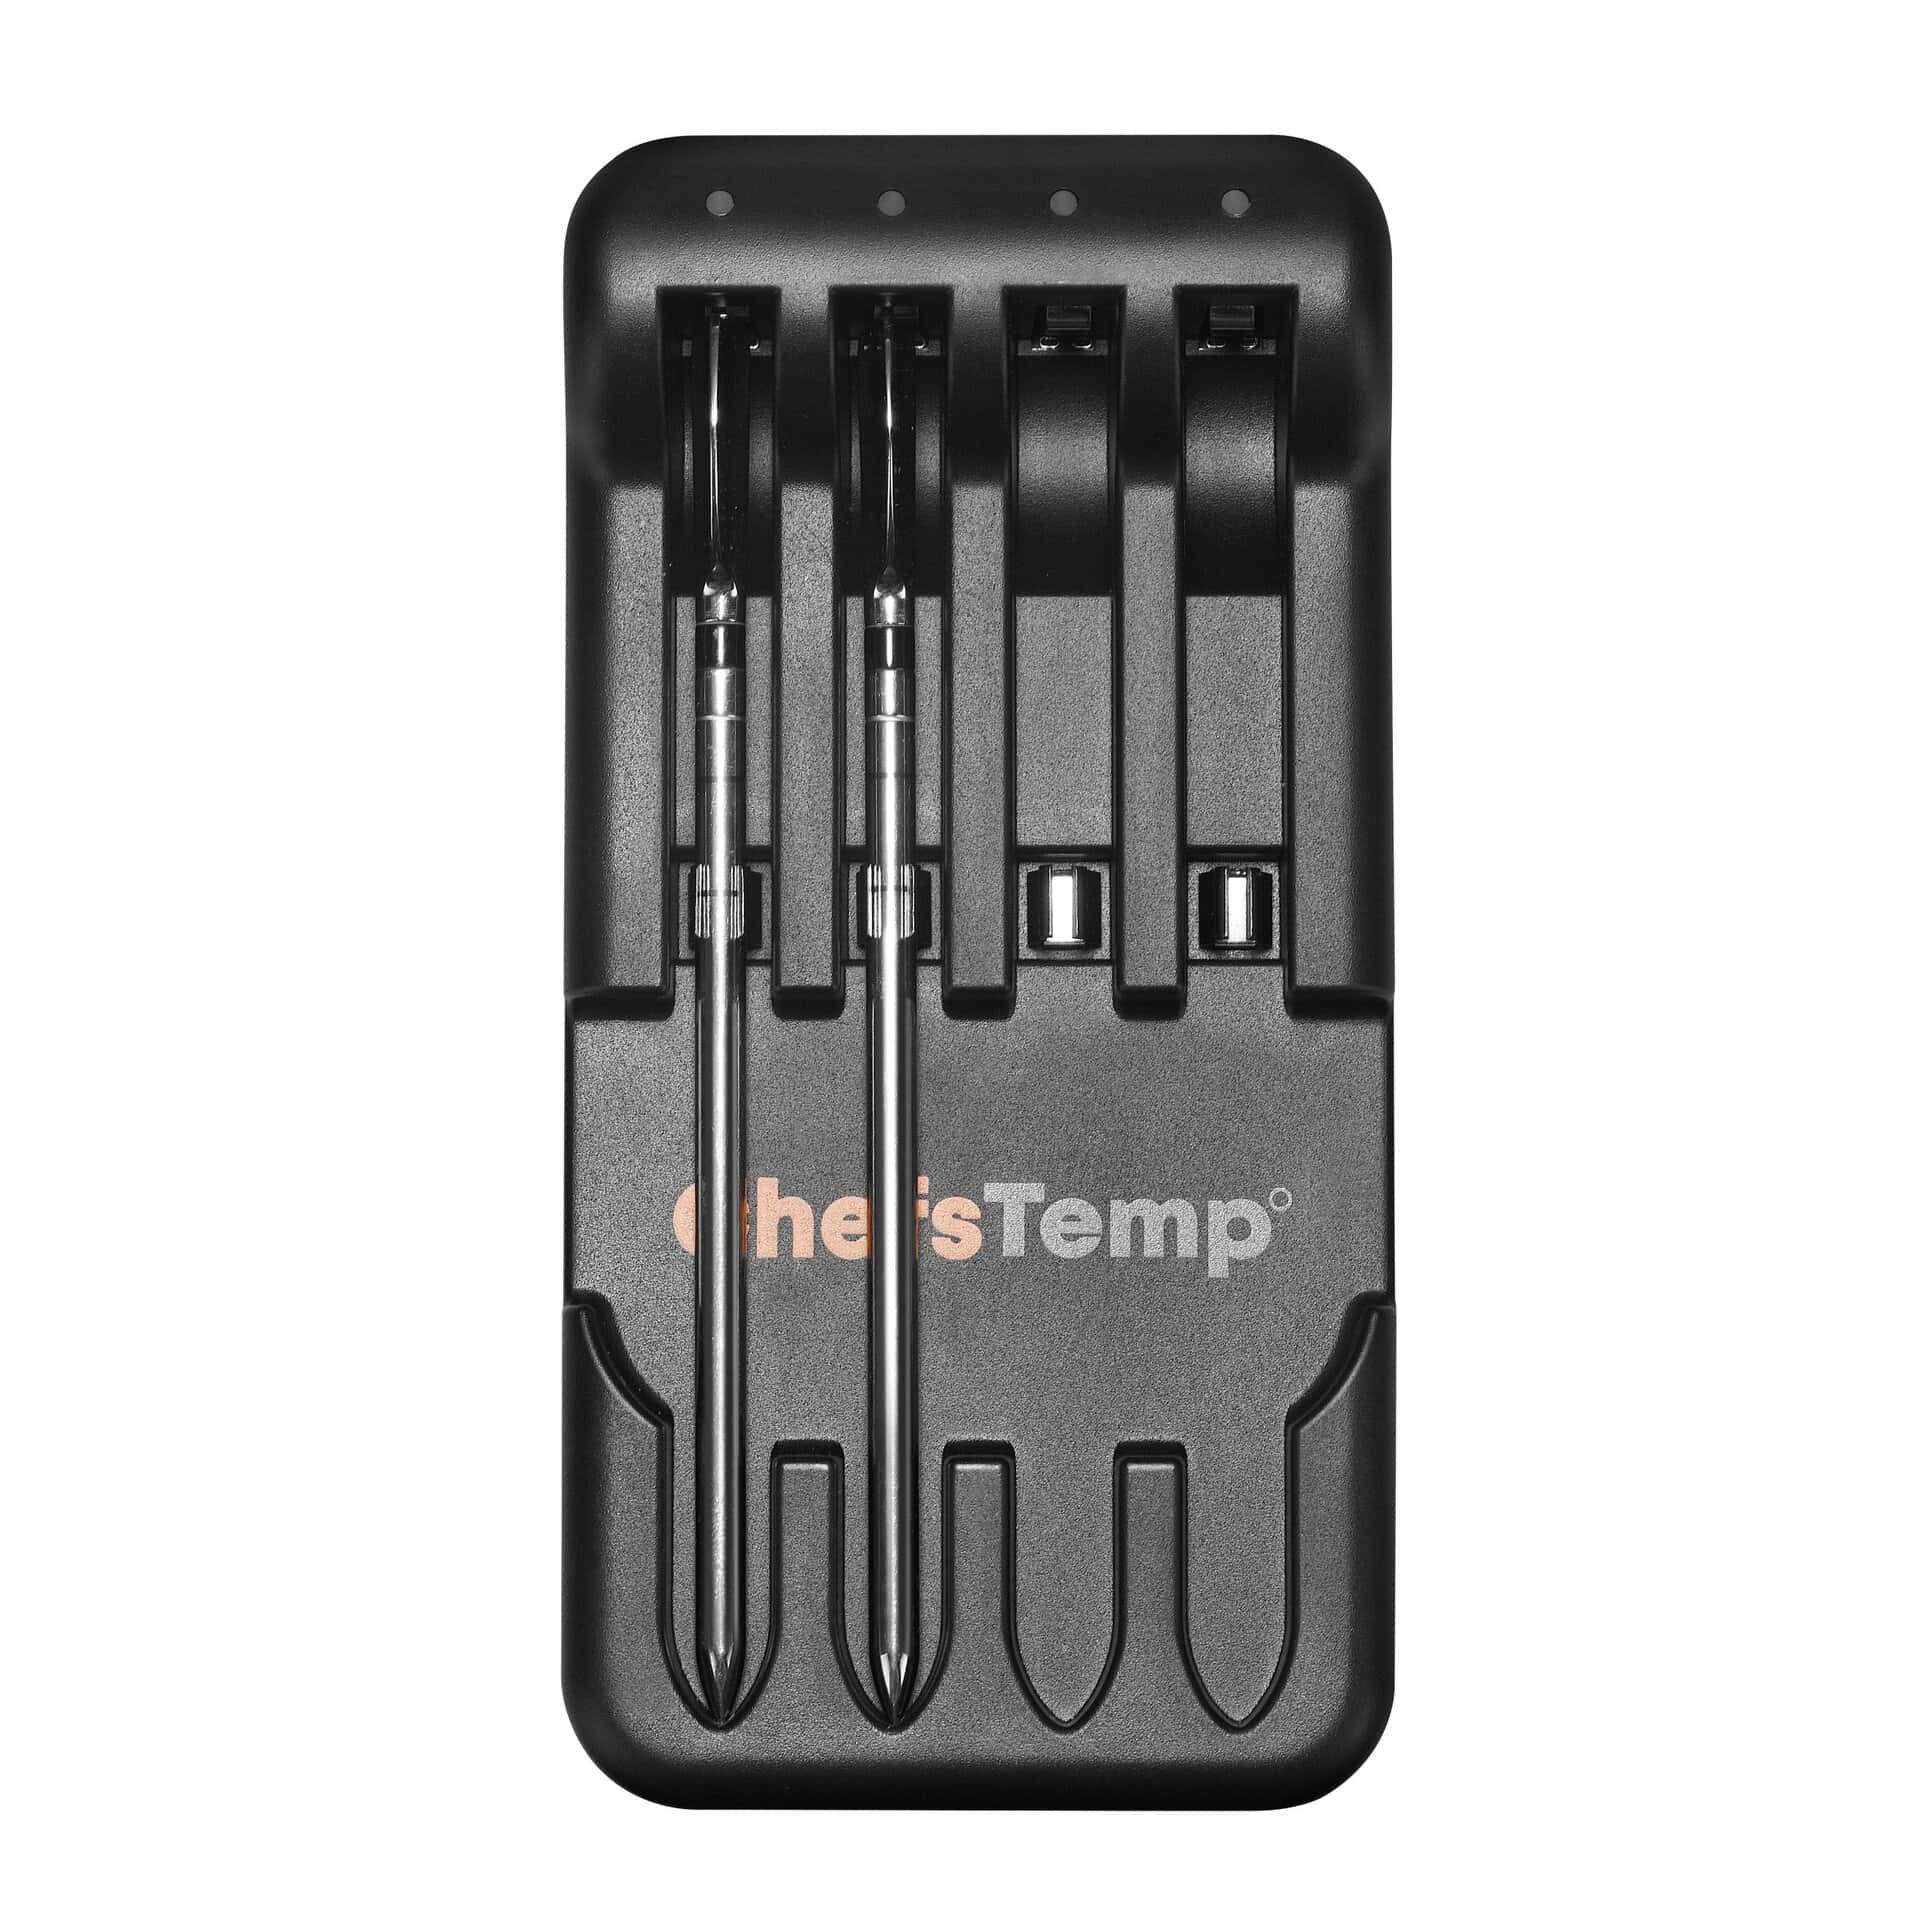
Om te controleren of uw meetsonde correct wordt opgeladen met de 4-in-1-oplader, dient u het volgende te controleren:
- LaadindicatorTijdens het opladen van de sensor gaat er een blauw lampje branden bij de bijbehorende oplaadsleuf. Het lampje gaat uit zodra de sensor volledig is opgeladen, wat aangeeft dat deze klaar is voor minimaal 30 uur gebruik.
- SondeoriëntatieZorg ervoor dat de sonde correct is geplaatst, zodat het uiteinde volledig contact maakt met de metalen plaat in de sleuf van de oplader.
If you are not sure if the probe has been fully charged or if it is unable to be charged, please go to My Connections >> My Paired Probes >> Tap your probe to check its battery.
Als het probleem aanhoudt, probeer dan de volgende stappen:
- Download de LightBlue-app en controleer of 'Probe' in de lijst met apparaten verschijnt. Elke opgeladen probe zou als een aparte vermelding moeten worden weergegeven.
- Record a short video showing the probe charging and send it to [email protected]. We’ll review it promptly and resolve the issue.
If your Charger can power on (red light on), but all probes do not display when charging:
Place the probe in reverse on the Charger, with the probe tip touching the metal plate at the bottom of the charging slot and the probe touching the middle spring. Check if the Charger lights up blue and flashes. If the blue light is on, it indicates that the Charger is functioning properly and the problem lies with the probe itself. If there is no blue light, it indicates that the Charger has malfunctioned.
If you experience connection issues with your probes (can not connect the probes to ProTemp S1/ProTemp Plus Series, or the probe is disconnected during use), please try the following step-by-step guide:
- Delete all your connection in the app, including ProTemp S1, ProTemp Plus/ProTemp 2 Plus and probes.
- Uninstall the ChefsTemp app and reinstall it, ensure that your app is the latest version.
- Fully charge everything: Place all probes in the 4-in-1 Charger or ProTemp Plus/ProTemp 2 Plus Stand for at least 15 minutes.
- Pair probes one at a time: Take only one probe out of the Charger/Stand to pair. Wait for it to connect successfully, then put it back, and repeat with the next probe (Click on “…” in the upper right corner of the app homepage, click on “My Connections”, click on “Add New Probe”, and then click on “Probe” in “SEARCHING FOR NEARBY PROBES”).
- Ensure that your ProTemp S1 and ProTemp Plus/ProTemp 2 Plus Stand are located close to the probe to ensure smooth transmission of probe signals.
This method avoids signal interference between probes and helps the app detect them correctly.
If your probe still cannot connect, you can perform the following confirmation steps:
- Click on the probe icon on the probe page to perform fault diagnosis. You can watch this video to perform the operation: New ChefsTemp App Update Guide | How to Diagnose Disconnection Issues
- After charging the probes, remove them from the Charger/Stand, download and open the LightBlue app, search for “Probe”, and see if you can find them. Each charged and removed probe will display a line of “Probe”.
- Please take a video of your complete connection operation, screenshots of the app homepage and diagnostic information, as well as LightBlue screenshots and send them to us. We will analyze and provide a solution for you.


Beoordelingen
Er zijn nog geen recensies.