

How to Make Beef Tallow from Brisket Trimmings
If you’ve ever trimmed a whole packer brisket, you’ve probably looked at the pile of fat headed for the trash and wondered if there was a better use for it. The answer is yes: beef tallow.
Homemade tallow is one of the easiest ways to get more value from every brisket you cook. Whether you’re frying potatoes, sautéing vegetables, seasoning cast iron, or adding richness to barbecue, quality tallow is liquid gold.
The best part is that making it requires very little effort. With the right brisket fat and a little patience, you can produce clean, shelf-stable tallow that rivals anything you can buy in a store.
Table of Contents
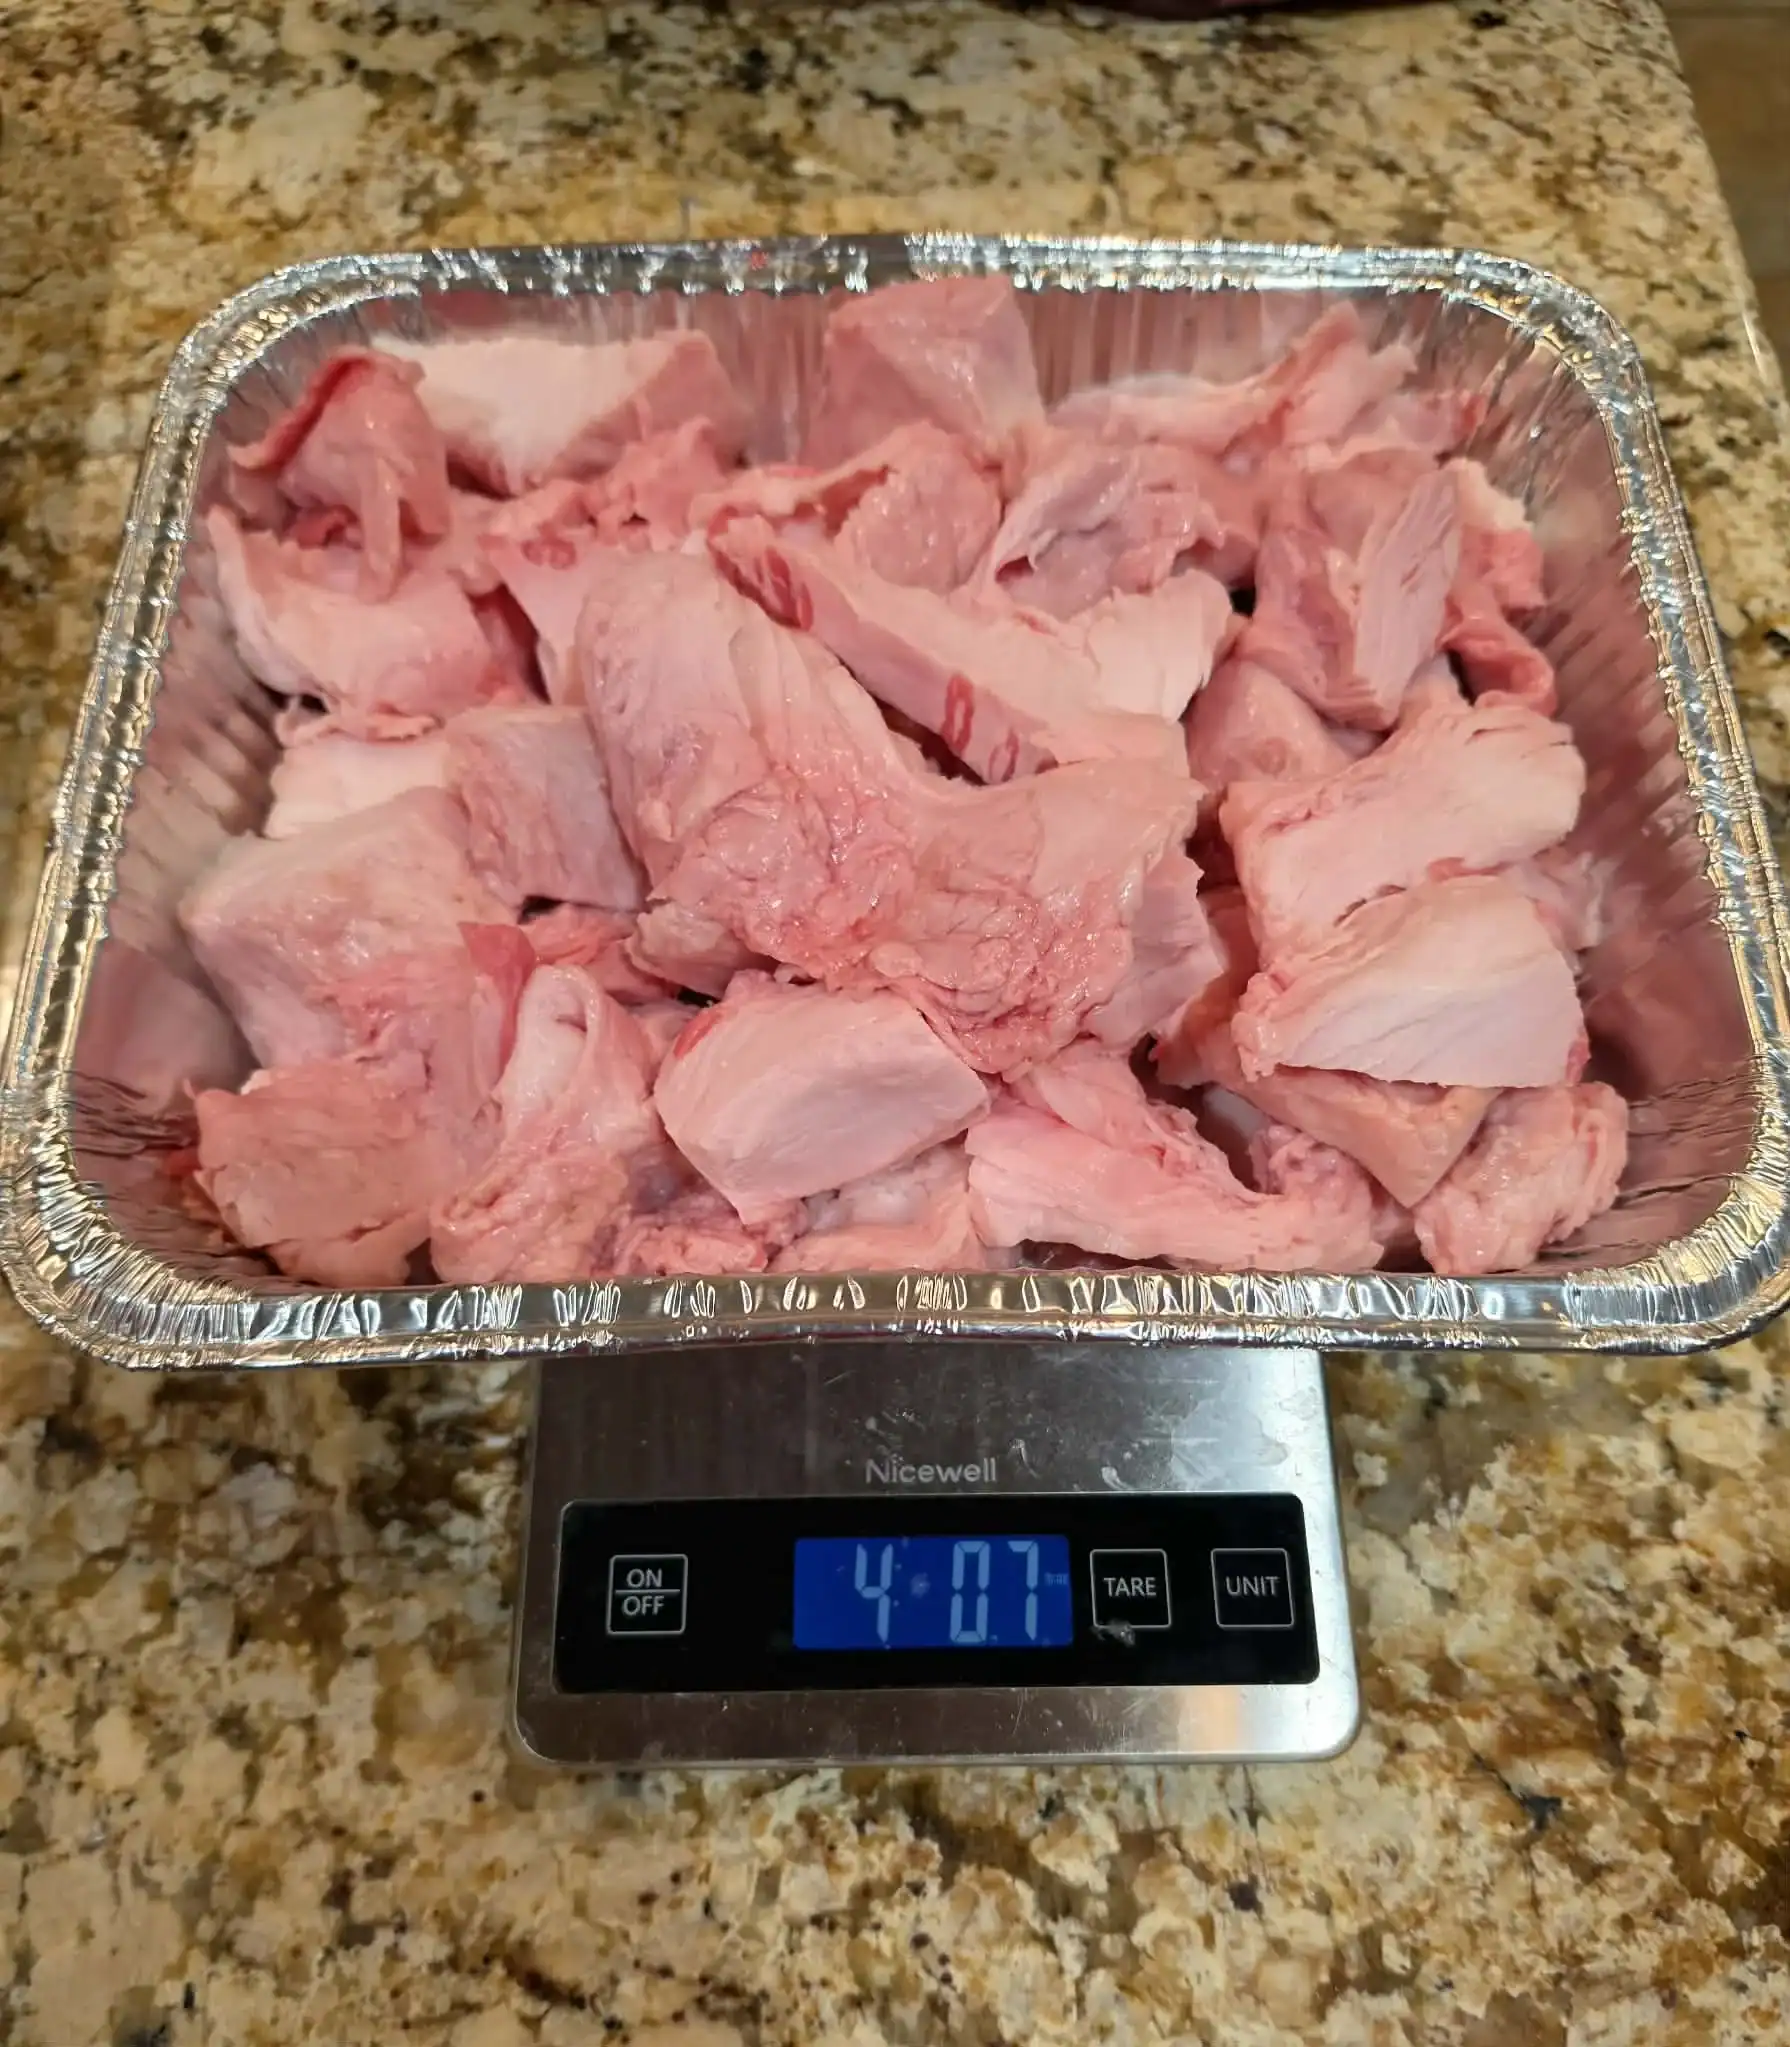
Start with the Right Fat
Not all brisket fat is created equal.
For the highest-quality tallow, save the deckle (hard, white) fat from your brisket trim. This fat is often found between the point and flat and around the thicker exterior sections of the brisket. It renders cleaner and produces a lighter-colored finished product.
Avoid using:
- Yellowed or oxidized fat
- Fat contaminated with excessive meat
- Large amounts of silver skin
- Blood-stained sections
A small amount of meat attached to the fat isn’t a problem, but the cleaner you trim, the cleaner your finished tallow will be.
Cut the Fat into Small Pieces
The more surface area you create, the faster and more efficiently the fat will render.
You can:
- Dice the fat into 1-inch cubes with a knife
- Run it through a meat grinder
- Pulse it in a food processor
Grinding produces the fastest render, but simple cubes work perfectly well.
Three Ways to Render Tallow
There are several methods for rendering beef fat. Each produces good results, but there are important differences.
Method 1: On the Smoker
Many barbecue cooks prefer rendering tallow on the smoker because it captures a subtle smoky flavor.
Place the fat in a disposable aluminum pan or cast-iron pot and cook at 225°F–275°F until most of the fat has melted.
Advantages:
- Adds light smoke flavor
- Uses the heat already generated during a cook
- Easy to do alongside brisket or ribs
Disadvantages:
- Takes longer
- More exposure to oxygen can slightly darken the tallow
- Requires monitoring if temperatures fluctuate
Expect rendering to take 4–8 hours, depending on volume and temperature. To make this completely foolproof, I always rely on my ChefsTemp ProTemp S1 to keep an eye on the ambient temperature. It alerts me if the smoker gets too hot, ensuring my liquid gold doesn’t scorch or darken.
Method 2: Crockpot
The crockpot is arguably the easiest method.
Place the fat in the slow cooker and set it on low. Allow it to render for 6–10 hours, stirring occasionally.
Advantages:
- Set-it-and-forget-it convenience
- Very low risk of scorching
- Produces consistently clean tallow
Disadvantages:
- Slowest method
- No smoke flavor
For most home cooks, the crockpot provides the best balance of convenience and quality.
Method 3: Stovetop
The stovetop is the fastest option.
Place the fat in a heavy-bottomed pot and add a few tablespoons of water to prevent sticking during the initial heating stage. Cook over low heat, stirring occasionally.
Advantages:
- Fastest rendering method
- Easy temperature control
- Produces exceptionally clean tallow
Disadvantages:
- Requires more attention
- Higher risk of scorching if the heat is too high
Keep the heat low. You’re rendering fat, not frying it.
Tip: Click here to read more about how to wrap brisket if interested.
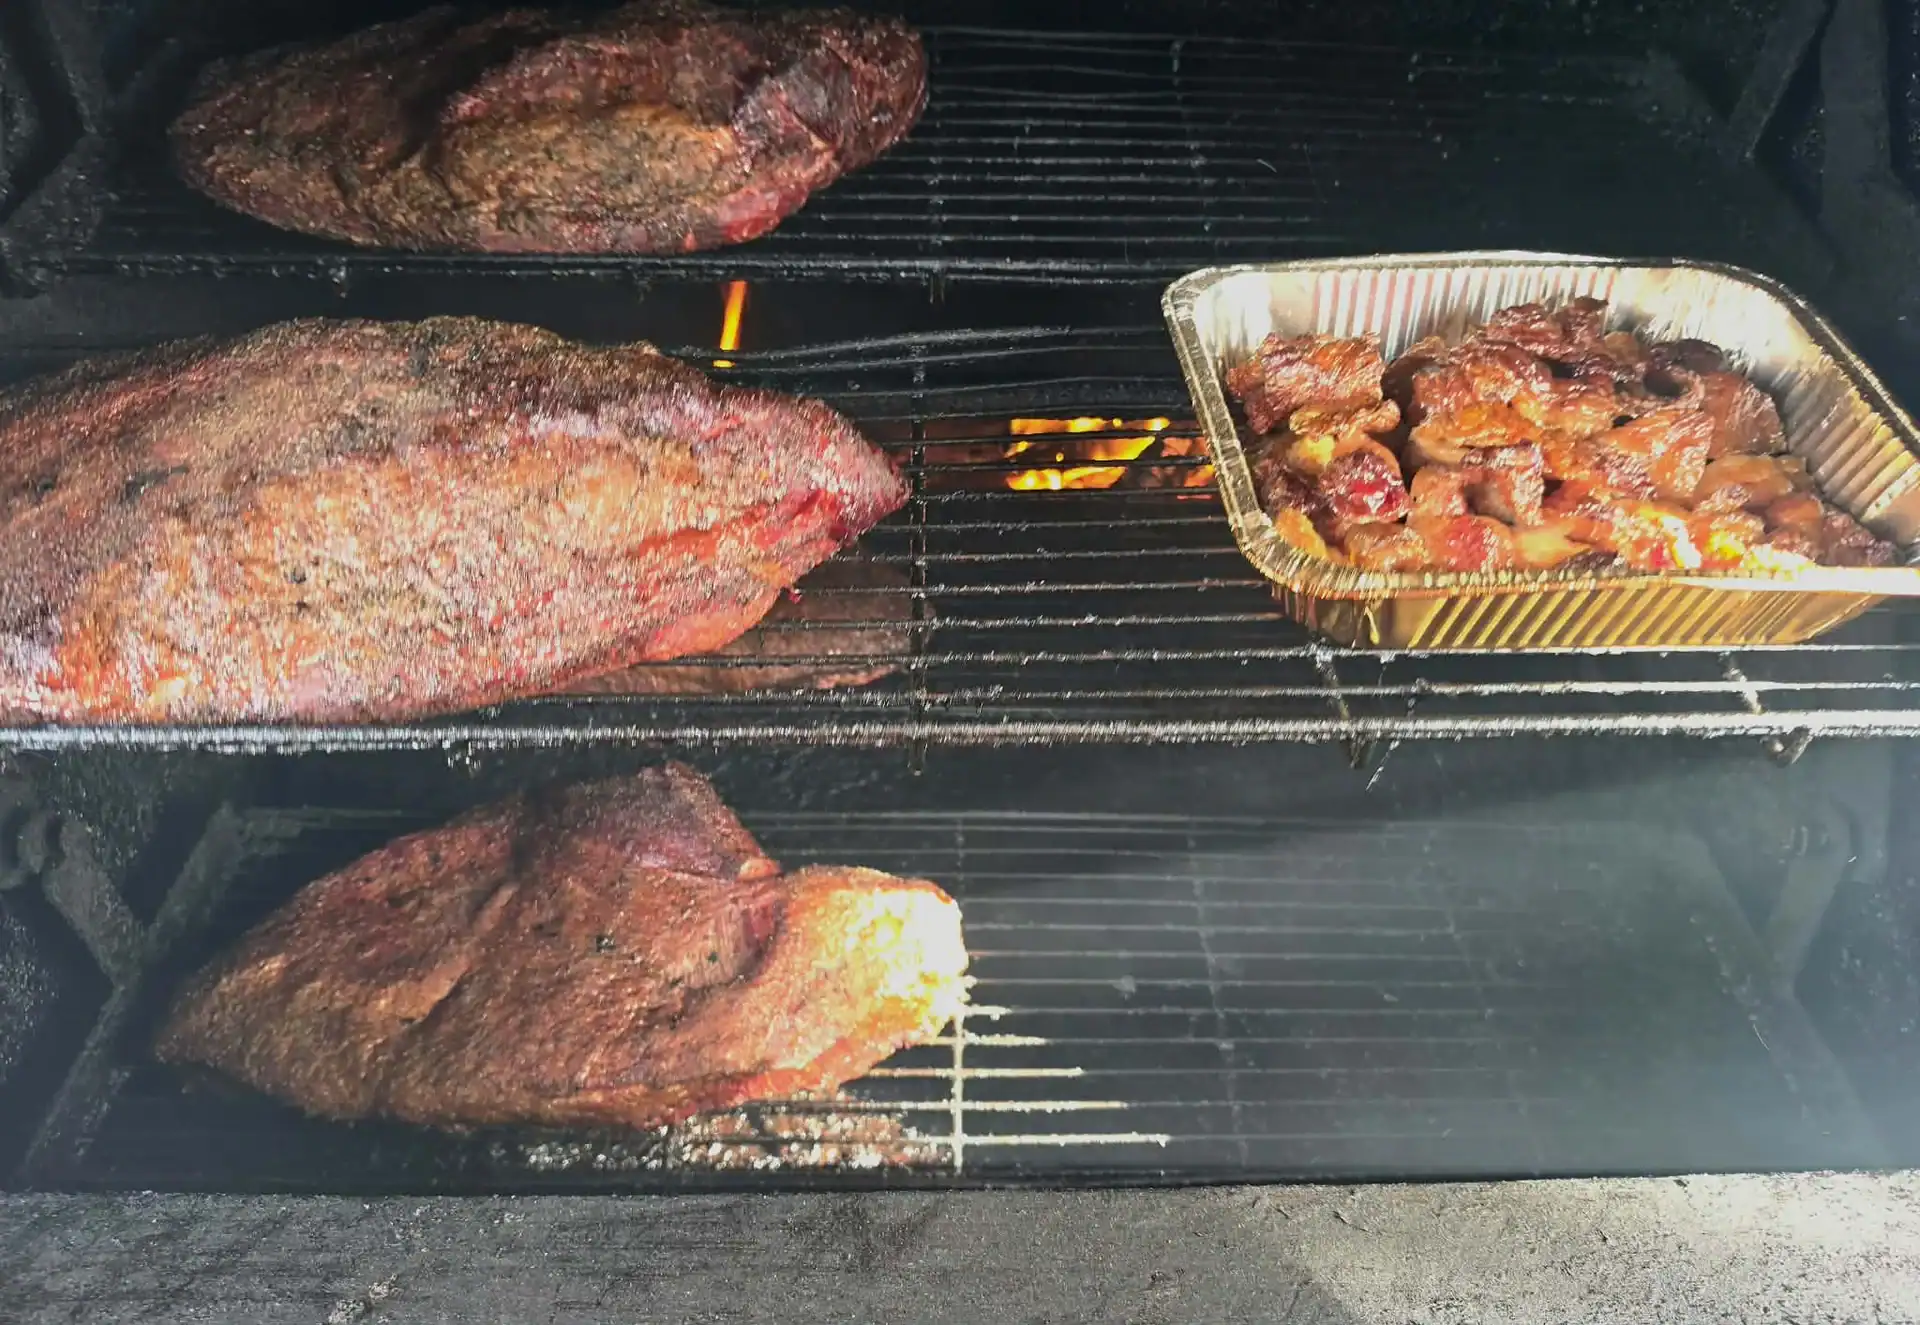
Rotisserie Rendering: My Preferred Method
One of my favorite ways to render tallow is on my rotisserie-equipped smoker.
The constant movement exposes more area to heat, slowly rendering the fat without hot spots. The result is an excellent yield and a mild smoky flavor that works perfectly in barbecue applications.
The key is keeping temperatures moderate. I prefer to stay between 225°F and 250°F and allow the fat to render gradually. You also want to make sure you are not placing anything on top of your tallow pan. You do not want your raw chicken dripping into your pan. Yuck!
Tip: Click here to get the Finaltouch X10 instant meat thermometer for real-time & accurate temp reading.
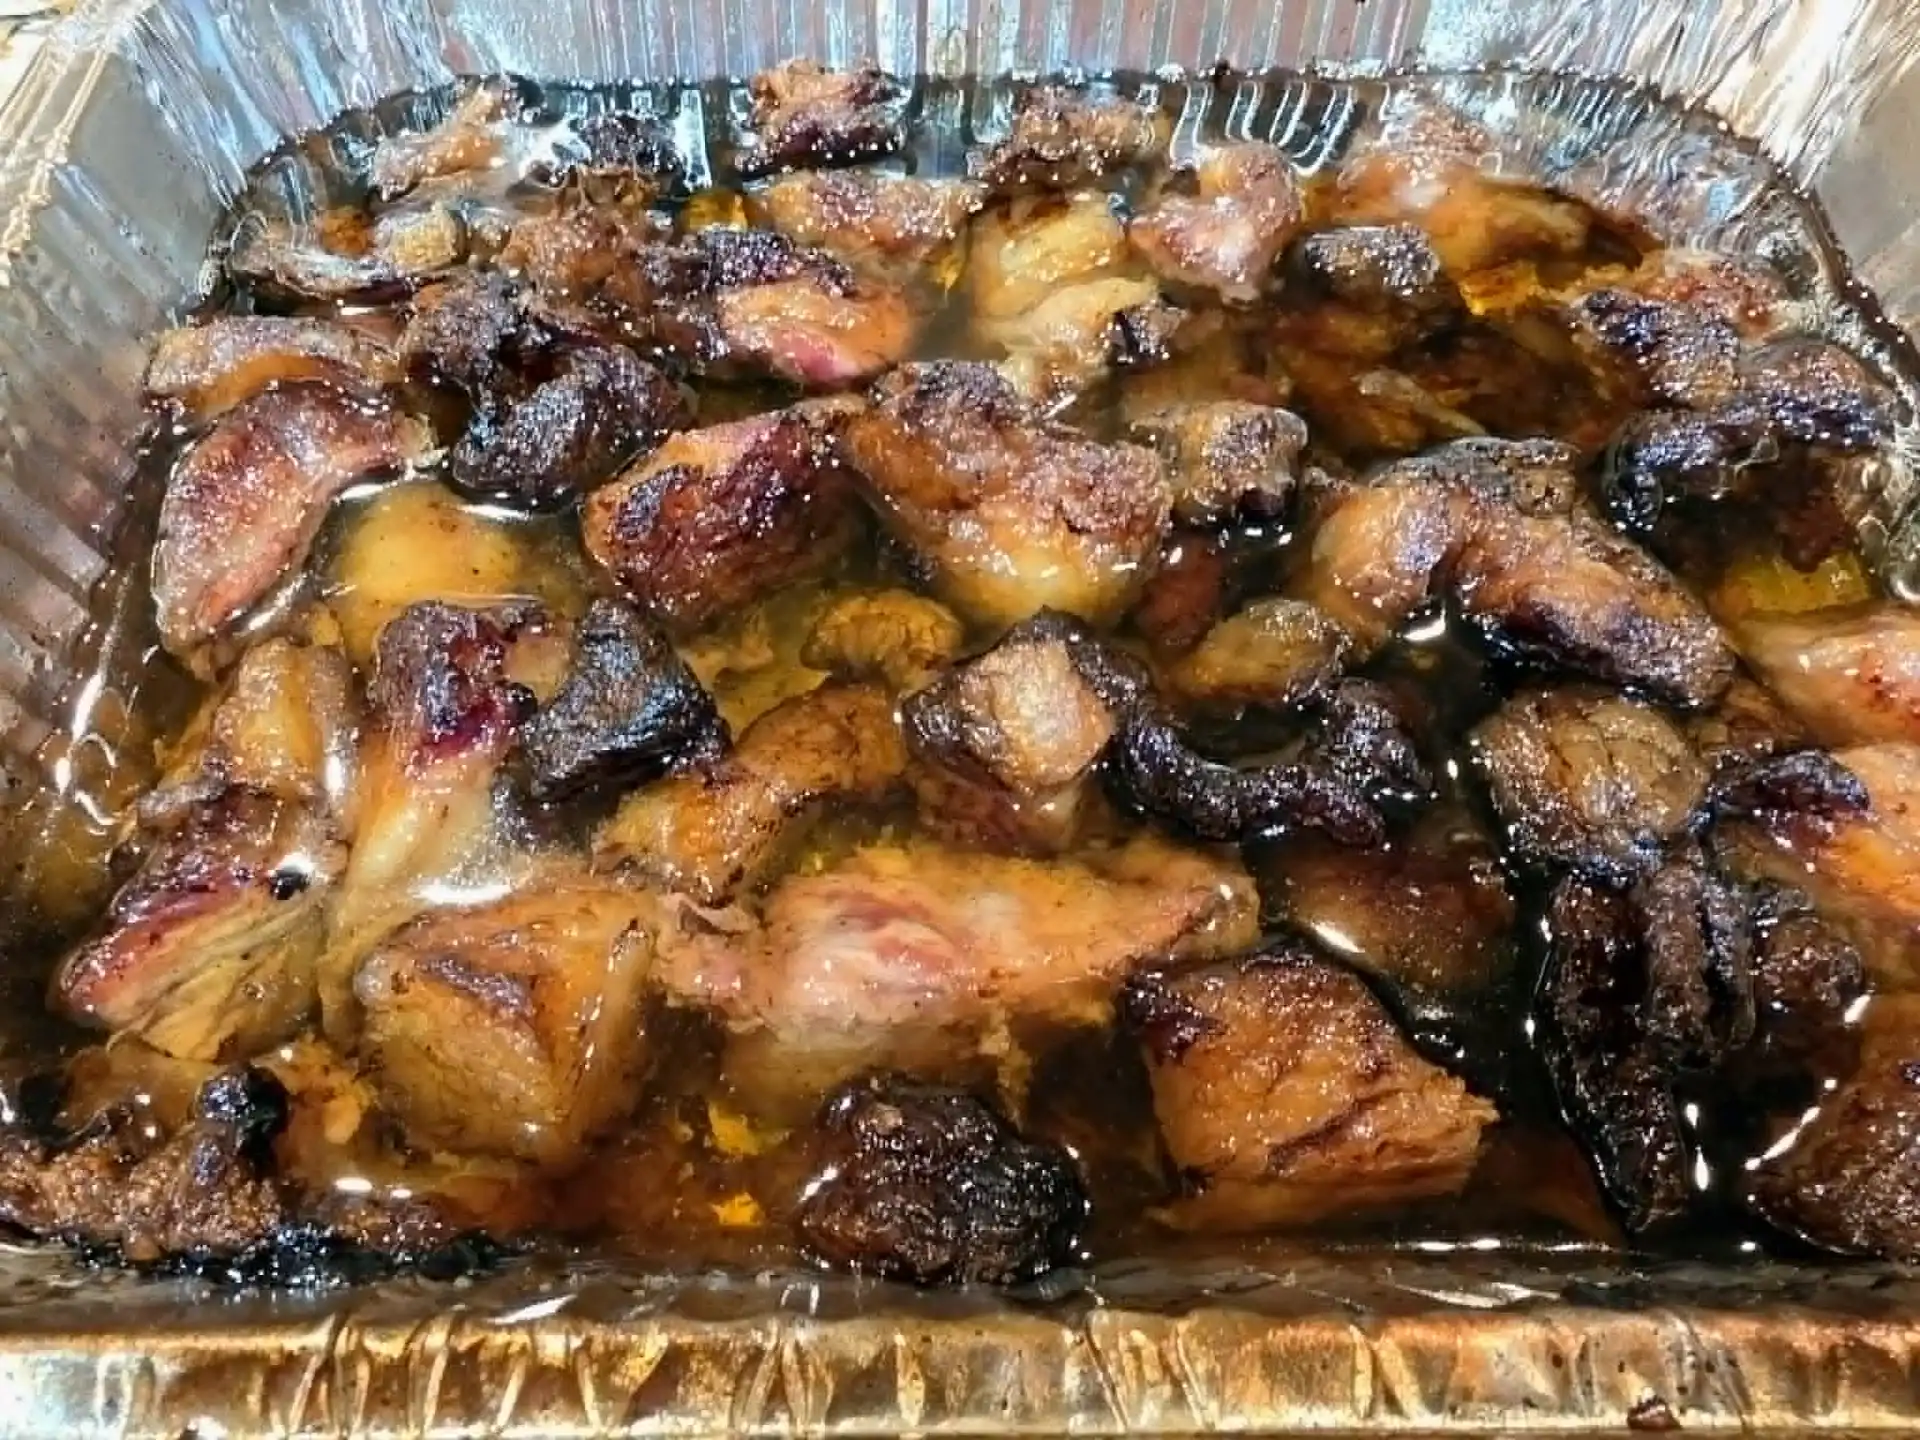
Strain the Tallow
Once the fat has mostly melted and the remaining solids have turned golden brown, it’s time to strain.
Line a mesh strainer with:
- Cheesecloth
- Coffee filters
- Fine mesh filtration bags
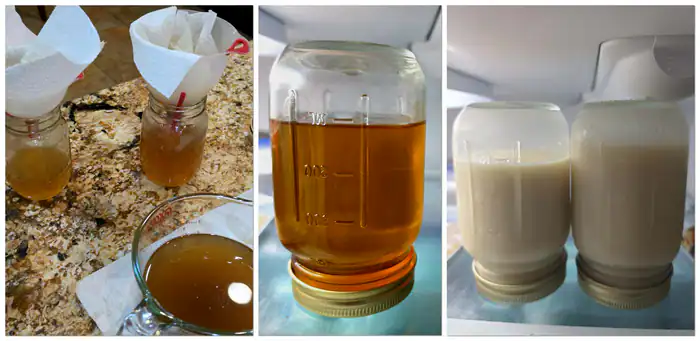
Carefully pour the liquid tallow through the filter into a heat-safe container.
This removes cracklings and most impurities that can shorten shelf life.
For extra-clean tallow, strain it a second time (or a third).
Jar and Cool
Pour the strained tallow into clean mason jars while still warm.
Allow the jars to cool slightly before placing them in the refrigerator.
As the tallow cools, it will turn from a golden liquid into a creamy white solid.
The Inverted Jar Trick
This simple step makes a huge difference.
When placing the jars in the fridge, turn them upside down.
The clean tallow will now be on the bottom, while any remaining impurities, moisture, or sediment will settle on the now-top surface.
Remove the lid and gently scrape away the darker layer.
This process leaves you with exceptionally clean tallow and can significantly improve storage life.
How to Store Beef Tallow
Storage life depends on cleanliness and moisture content.
- Room temperature: Several months in a cool, dark place
- Refrigerator: 6–12 months
- Freezer: 1 year or more
Always use a clean utensil when removing tallow from the jar to avoid introducing contaminants.
Storage Tip
Use an ice cube tray to portion out the tallow. Then, when you need a portion for cooking, you can pop out a tallow cube and throw it right in your pan or skillet. It’s like a pat of butter but 100x better!
What Can You Do with Beef Tallow?
Once you’ve made your first batch, you’ll find countless uses for it.
Popular options include:
- Frying potatoes
- Roasting vegetables
- Searing steaks
- Making tortillas
- Seasoning cast-iron cookware
- Enriching burgers and sausage
- Wrapping briskets during barbecue cooking
Many Pitmasters even add a spoonful of homemade tallow back onto sliced brisket before serving. I personally like to use it in my pan when scrambling eggs. It’s just another layer of flavor without any additional effort.
Tip: Click here to learn how to master the perfect brisket smoke temp, if needed.
Final Thoughts
Brisket is expensive. Even in Texas, where we consistently get Prime for ~$5 a pound, seeing four or five pounds of trimmings go into the trash makes your stomach turn. On fattier briskets, you are throwing away $20-$30 or more!
Making beef tallow is one of the easiest ways to maximize every brisket you buy. Instead of throwing away pounds of valuable fat, you can turn it into a versatile cooking ingredient that enhances everything from barbecue to weeknight meals.
Whether you render it on the smoker, in a crockpot, on the stovetop, or on a rotisserie, the key is patience, low heat, and proper filtration. Follow those steps, and you’ll end up with clean, flavorful tallow that keeps for months and adds rich beef flavor to nearly any dish.

Sean Hill is a decorated competition pitmaster, caterer and coach — A 2x World Food Championships Grand Champion, Texas HS BBQ grand champion coach, and ESPN-featured BBQ personality. He runs a thriving catering business and helps others sharpen their craft through coaching and collaboration.
Discover Other ChefsTemp Products


Discover more recipes and learn kitchen tricks by joining our cooking family on Facebook.
You may also like:


