

How to Turn a $200 Budget Offset Smoker into a Pitmaster-Level Machine: Proven Upgrades for Better BBQ
If you’re a backyard pitmaster or BBQ enthusiast dreaming of competition-quality ribs, brisket, or pulled pork but don’t want to drop $3,000–$5,000 on a high-end offset smoker, you’re not alone. Many serious BBQ lovers start with a budget offset smoker—often a thin-metal model from big-box stores—and wonder if it’s possible to make it perform like a premium pit.
Temperature stabilisation and heat management modifications can significantly upgrade a cheap offset smoker, significantly reducing temperature swings while cutting down on constant monitoring – helping create that desirable smoke ring with delicious results that pitmasters seek.
In this guide, we’ll cover real-world upgrades (such as fan-assisted temperature control) along with an in-depth Texas-style ribs cook test to demonstrate their performance, followed by an honest pros/cons analysis so you can decide whether budget-to-champion is a suitable approach for you.
Table of Contents
Part 1. Why Budget Offset Smokers Struggle
Entry-level offsets (around $150–$300) typically feature:
- Thin steel that heats quickly but loses temperature fast.
- Inaccurate stock thermometers.
- Poor airflow control leading to wild swings between 200°F and 350°F+.
Common pain points for BBQ lovers include creosote from unstable fires, uneven cooking, and endless vent tweaking. The fix lies in modern accessories that automate airflow and deliver precise monitoring—turning “set it and forget it” from a pellet-grill luxury into an offset reality.
Part 2. How Mods Fix It
Step 1: Essential Upgrades for Temperature Control
Focus on these high-impact mods first:
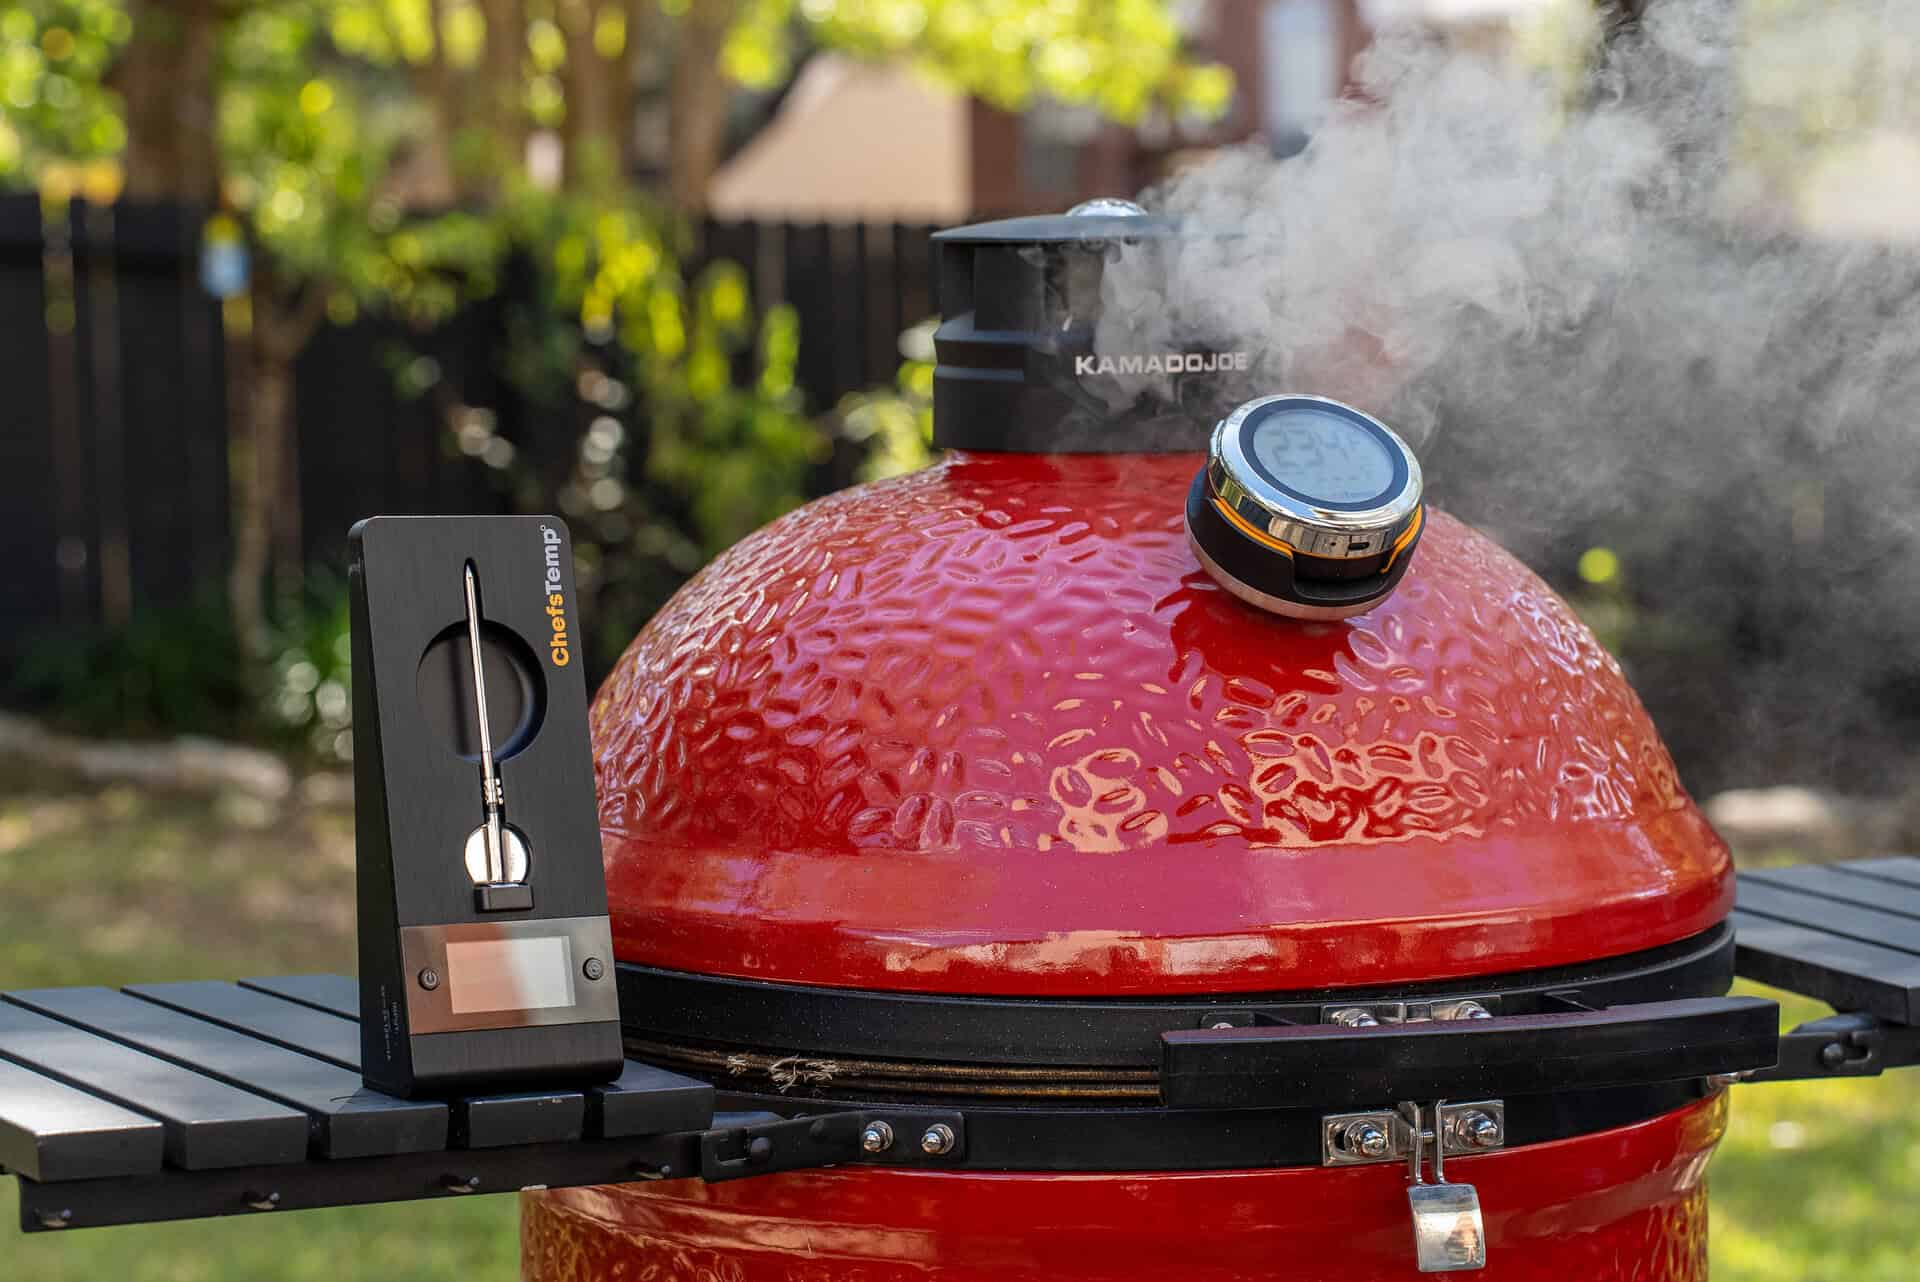
- Install a Digital Temperature Controller with Probe
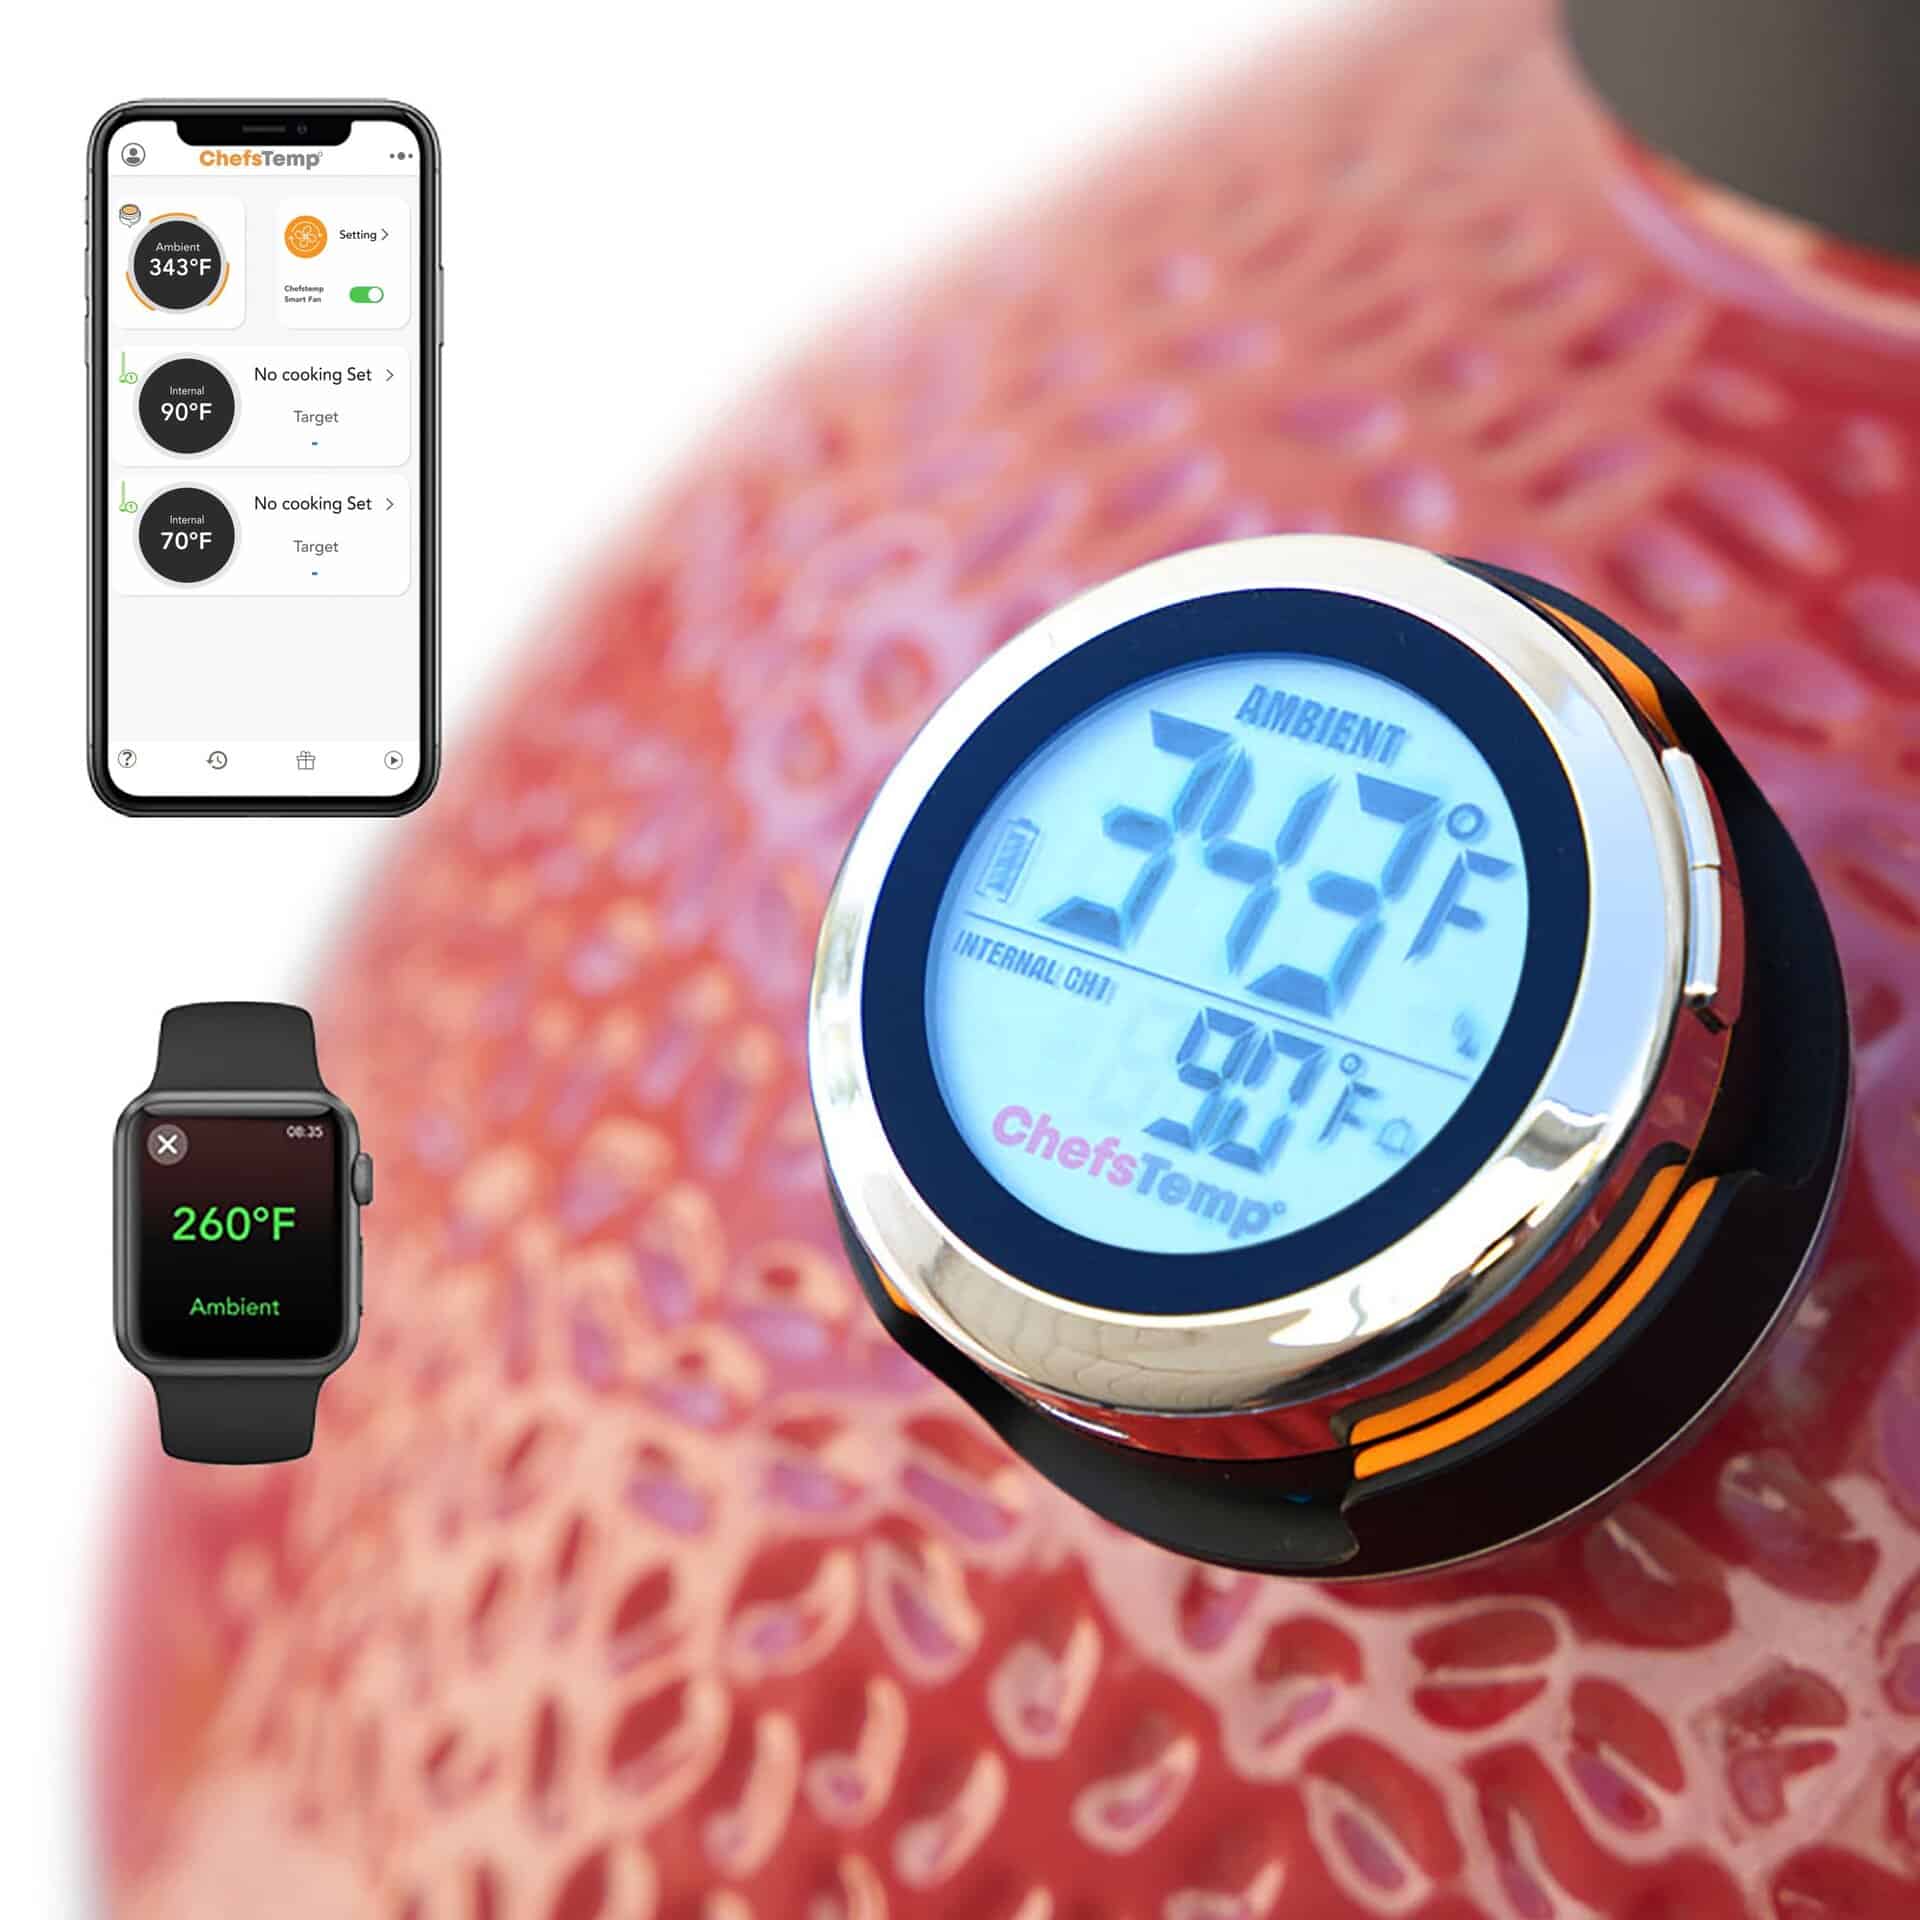
Replace the factory dial thermometer (often off by 50°F+) with a reliable digital system like the ChefsTemp ProTemp S1 (or a similar Wi-Fi/Bluetooth-enabled gauge).
- Mount the ambient probe in the cooking chamber for accurate grate-level readings.
- Add meat probes for remote monitoring of internal temps via app alerts. Benefit: No more guessing—get real-time data and stop opening the lid constantly.
- Add an Automated Blower Fan System
Attach a temperature-controlled fan (such as the ChefsTemp Breezo) to the firebox intake.
- The fan automatically pulses to maintain your target temp.
- Pair it with the digital controller for seamless integration. Benefit: Stabilises the fire, even with thin metal; great for overnight or long, brisket cooks with minimal intervention.
- Seal All Leaks
Use high-temperature gasket tape or silicone strips around doors, the firebox lid, and seams. Benefit: Forces controlled air through the blower only—no random drafts stealing heat or oxygen.
These mods (totalling $200–$300) often cost about the same as—or even less than—the smoker itself, but deliver the biggest leap in performance.
Step 2: Fire Management Tips for Budget Offsets
Even with upgrades, technique matters:
- Build a solid charcoal bed first, then add wood splits.
- Pre-heat your next log on top of the firebox lid—it ignites instantly for cleaner smoke and fewer temp drops.
- Keep the chimney mostly open; control primarily with intake (now automated by the fan).
Tip: Click here to learn more about how thermometer upgrades save money by reducing charcoal waste if interested.
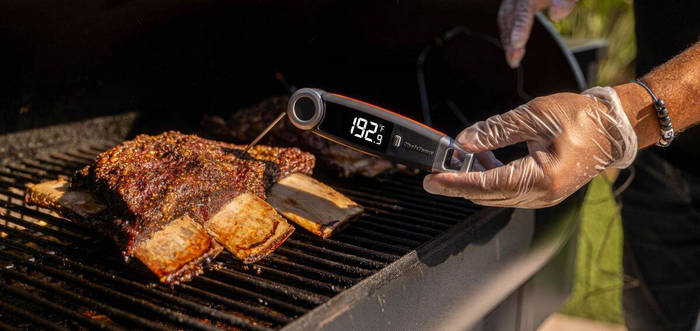
Step 3: Test Cook – Texas-Style Spare Ribs on the Upgraded Budget Pit
To prove the setup, run a classic low-and-slow ribs cook:
- Prep— Trim a full rack of spares St. Louis-style. Apply a base Texas all-purpose rub, then layer a fruity/spicy rub for depth.
- Smoke— Target 275°F in the chamber. Load the firebox, let the blower stabilise, and add pre-heated logs as needed.
- Cook— 3–3.5 hours total. Spritz every 45–60 minutes. The automated system holds temp tight with almost no adjustments.
Results? Ribs with deep mahogany colour, pronounced smoke ring, tender bite, and rich flavour—indistinguishable from higher-end pits in blind taste tests.
Part 3. Advantages of This Budget Upgrade Strategy
- Competition-Level Results — Perfect bark, moisture and smoke penetration at a fraction of the cost.
- Lower Hands-On Time- Fan + Digital Controller = Longer Sits without Stress
- Skill Builder- Mastering basic gear will prepare you to tackle larger pits later.
- An Affordable Entry — Save thousands while creating barbecue worth bragging about.
Part 4. Cons and Realistic Expectations
- Thin metal still cools faster when opened—expect slightly more monitoring than a 1/4-inch+ premium offset.
- Upfront mod costs add up (though often recouped in fuel efficiency and better cooks).
- Not fully “hands-free” like pellets—offsets still reward active pitmasters.
Final Verdict: Will It Benefit Serious BBQ Lovers?
Are You Serious About Learning Offset Craft Without Spending Big? Upgrading to a $200 smoker equipped with digital control and fan assist could be one of the smartest moves towards mastering offset craft without incurring major capital outlays. Many pitmasters report overnight briskets with consistent results after making these upgrades, showing it doesn’t take an expensive $4,000 setup to make champion BBQ in your own backyard!
Are you ready to transform your budget offset smoker? Start by installing a temperature controller and blower combo — your ribs (and your patience!) will thank you.
What modifications have you tried on your budget offset? Please share any tips in the comments – together, we are all learning!
Discover Other ChefsTemp Products


Discover more recipes and learn kitchen tricks by joining our cooking family on Facebook.
You may also like:


